


Is your electric water heater not working? This is how to repair an electric water heater.
NOTE: Some text links below go to applicable products on Amazon. As an Amazon Associate, I earn from qualifying purchases. Using my links helps to keep this website FREE.
When you find your electric water heater is not working, try resetting the water heater circuit breaker in your home’s main electrical panel by pushing it off and then on. The circuit breaker should be a two-pole breaker, meaning it takes up two full spaces in the electrical panel. If nothing changes, leave the circuit breaker in the off position.
Two covers are on the side of an average home’s electric water heater tank. The upper heating element and thermostat are behind one, and the lower heating element and thermostat are behind the other.
With the power turned off at the circuit breaker, open the upper element cover on the water heater tank using a screwdriver or nut driver. Gently remove the insulation block and the plastic cover over the thermostat, and push the red reset button. Turn the circuit breaker on and see if the water gets hot.
WARNING: The following steps to determine why your electric water is not working require you to work with live electricity. If you have no experience with that, you should call an electrician. If you do plan to continue, protect yourself with electrically insulated gloves to avoid getting shocked or electrocuted.
If nothing is improved after pressing the red reset button with the power on, Check for 240-volt power at the upper thermostat terminals 1 and 3 (See wiring diagram below) using a two-prong voltage tester or a CAT III or CAT IV multimeter. If no electrical power is there, test for voltage at the built-in electric water heater junction box where the circuit wiring is connected on top.
Do you have no hot water, or does the hot water run out faster than usual? If the hot water runs out faster than expected, the problem is likely a bad lower heating element or a bad lower thermostat. In addition, a malfunctioning upper thermostat could prevent the lower heating element from turning on.
More explicit details and photos are below.
Table of Contents:
- How A Water Heater Works
- Water Heater Not Working With Power On
- Testing The Heating Elements
- How To Replace A Heating Element
- What To Do When A Water Heater Has No Power
- Tools For Troubleshooting
- Water Heater Manufacturer Links
If you see water dripping from the tank, it is time for a replacement. Tanks cannot be repaired; they can only be replaced. When installing a new electric water heater, I recommend installing a plastic pan under it to prevent future flooding.
An electric water heater should have a plastic pan, while gas or oil-fired water heaters should have a metal pan under them.
Several things could cause the electric water heater to stop working. A tripped or defective circuit breaker or a loose electrical connection will prevent the electric water heater from operating. A disconnect switch at the water heater location could be off or have gone bad. The controls on the water heater itself could have tripped to the off position or gone bad. And lastly, one or more of the electric heating elements in the water heater could have burned out.
These symptoms are easy to check and test for; however, it means working with LIVE ELECTRICITY. If you lack experience working around live electrical circuits, I suggest calling a professional electrician.
HOW DOES AN ELECTRIC WATER HEATER WORK?
The sequence of operation of a standard residential electric water heater with a two-heating element tank is as follows: With a tank full of cold water, the upper heating element turns on first. When the water temperature rises to the level that satisfies the upper thermostat, the upper heating element will shut off, and power will go down to the lower heating element thermostat.
The upper thermostat has a built-in double-throw switch that goes forth and back between the upper and the lower heating elements as determined by the upper water temperature.
The lower heating element will stay on until the water temperature reaches the lower thermostat setting and shuts off.
When you turn on the hot water faucet in your home, hot water comes from the top of the tank, travels the pipes, and flows out the spout or showerhead. When that happens, cold water enters the bottom of the water heater tank through the dip tube, lowering the water temperature as the water is replenished.
The lower heating element will heat that water until the water in the upper part of the tank starts to cool. When that happens, the upper heating element will come on, and the lower heating element will shut off.
The lower heating element tends to die sooner than the upper element. With only the upper heating element working, you would still get hot water, but the stored hot water in the tank would get used up much faster than with both heating elements operating as designed.
If the upper heating element fails, then the lower element will not be able to turn on, and you will have no hot water.
According to the manufacturer’s instructions, Regular tank draining can help the heating elements operate most efficiently and last longer.
The upper and lower heating elements are identical, but the upper and lower thermostats are not.


The upper thermostat has a red reset button, which trips off and kills power to both heating elements when the temperature gets too hot. The lower thermostat only regulates the temperature for the lower heating element.


My first step would be to check for 240-volt power using my Wiggy voltage tester. A non-contact voltage tester is unsuitable for testing voltage on a water heater because you could get false readings.
I would test voltage first at the upper heating element thermostat at terminals 1 and 3, at the top of the stat opposite one another.
If there is no power at the thermostat, I would check for 240 volts at the built-in junction box at the top of the water heater where the electrical power enters.
Turn off the power at the circuit breaker, remove the cover, and pull out the spliced electrical connections. Remove the wire connectors and check for voltage between the two hot wires. You should wear insulated electrical gloves when doing this.
NO HOT WATER WITH POWER ON


If you have 240-volt power at the water heater junction box, then the problem of the electric water heater not working could very likely be internal. The covers on the side of the water heater would need to be removed so that voltage can be checked at the controls.
However, before I check for voltage at the control and element terminals, I would push the red reset button in the upper compartment behind the cover. If there is a block of insulation or a protective plastic cover after removing the outer metal cover, pull it out and save it for reinstallation.
Resetting the red thermal overload button may be all that is needed to get the water heater working again. However, the question remains: why did the thermal overload trip off? These usually trip off when the temperature is too hot. Maybe the thermostat is bad, or is the temperature set very high?
With the power on and after the reset button has been pushed, use a voltage tester or a Cat III or IV volt ohmmeter to check the voltage on the screw terminals at each heating element. Only one heating element should be on at a time unless the water temperature is hot enough to shut off both thermostats.
In that case, take a hot shower or do a load of laundry with hot water to bring cold water into the tank, which will turn on one heating element and then the other. Check for voltage at the upper heating element first. When that shuts off, check the voltage at the lower element.
If you get voltage at each heating element in the proper sequence, the problem may be a bad heating element. If you don’t get voltage at each element, the problem could be a bad thermostat.
I had a unique experience wiring a client’s new electric water heater. I wired the water heater, flipped on the circuit breaker to get it hot, and checked to ensure it worked correctly. It was not
Shortly after turning on the power for the first time on the water heater, the breaker tripped off. I got out my Amprobe Ammeter and put it on one of the wires connected to the water heater circuit breaker inside the electrical panel. The water heater was drawing double the current (Amps) that it should have been.
During my investigation, the thermal overload on the upper heating element also tripped off, which meant the water was getting too hot.
The short story is that the upper thermostat module was bad, causing both heating elements to operate simultaneously. Usually, only one heating element is on at any time.
I contacted the factory, and they shipped a new, free replacement thermostat module. Still, to get my client going immediately, I went to a big store and bought a generic electric water heater thermostat that fit perfectly on my client’s water heater.
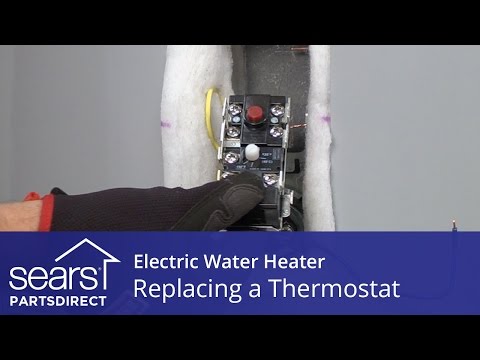
Replacing a water heater thermostat is not difficult. First, take a picture of the electrical connections before taking anything apart. Then loosen the screw terminals and pull the wires from each screw terminal. Rather than move the wires out of the way, I prefer to leave them as they are positioned initially as much as possible to make connecting to the new thermostat easier.
It would be terrific if you could take one wire off the old thermostat at a time before removal and put it on the new thermostat before it is installed. However, wires are not always long enough to do that.
Here’s a short video demonstrating water heater thermostat removal:
Draining an electric water heater tank to replace the thermostats is unnecessary. The tank only needs to be drained when replacing the heating elements.
HOW TO TEST WATER HEATER HEATING ELEMENTS
Use a Cat III or Cat IV volt ohmmeter to test the heating elements before attempting to remove them. Shut off power to the water heater at the circuit breaker. Confirm with a voltage tester that the power is off. Disconnect the two wires on the heating element.
Set your volt ohmmeter to measure resistance at the lowest scale (R1) and connect one probe to one screw terminal on one of the heating elements and the other volt ohmmeter probe to the other screw. Write down the measurement. Now, check the other heating element the same way and write down that reading.
Usually, both measurements would be nearly identical. If they are not, one element is going bad.
A 240-volt, 1500-watt water heater heating element should measure around 38 ohms, a 2000-watt element should be 28-29 ohms, a 2500-watt element should be 23 ohms, a 3000-watt element should be about 19 ohms, a 3,500-watt element should register around 16 ohms, a 4,500-watt element should read between 12 and 13 ohms, and a 5,500-watt element should register between 10 and 11 ohms.
Next, attach one of the meter probes to the metal jacket of the water heater or hold it to the metal tank. Use the other meter probe to touch each screw terminal on both heating elements. Write down those measurements.
Also, use the other probe to test the metal hex nut of the heating elements and write down the measurements.
If your meter indicates any measurements, no matter how small when testing the metal tank, the element(s) must be replaced.
HOW TO REPLACE A WATER HEATER HEATING ELEMENT
To replace a heating element on an electric water heater not working, turn off the power going to the water heater. Check to ensure power is off at the water heater using a voltage tester.
Connect a garden hose to the drain valve. With the water to the heater still on, open the drain valve at the bottom of the tank briefly to flush out any sediment. Do this a few times until no more sediment is observed coming out of the hose.
Next, turn off the water supply going into the water heater. Open the drain valve again and let all of the tank pressure out. Turn on a hot water faucet in the kitchen, bathroom, or both after the pressure is down.
Draining will take a long time but can be speeded up by opening the temperature-pressure relief valve (TPR) on the side of the water heater. That will allow more air to come in. Just lift the handle on the TPR to let air in.
Some plumbers use an air compressor to pump higher air pressure into the tank to force the water out faster. You could also remove the lower heating element to drain the tank, but this will be messy and cause a flood if you cannot direct the water somewhere, such as the pan beneath it, with a drain pipe.
I have also seen some people remove the drain valve from the bottom of the tank to let the water flow out faster. It would be best if you had a way to contain or direct the 30 – 80 gallons of water that will quickly come out; otherwise, you will have a flood.
Sometimes, there is so much sediment at the bottom of the tank that the drain valve gets clogged. Pushing a piece of #14 solid copper wire through the drain valve may clear it. Otherwise, removing the drain valve or the lower heating element is the most viable option for draining the tank.
One problem that may arise from opening the drain valve is that the drain valve may not close entirely again and will drip. You can put a cap on it or change the valve to a better-quality unit. I like a brass valve better than a plastic valve.


I used a 3/4″ breaker bar with a standard three-quarter inch drive 1 1/2″ six-point hex socket to remove this heating element. This is not the best tool for removing water heater heating elements.
The breaker bar does give me significant leverage, but due to the beveled or chamfered inside edges of the socket and lack of depth on the heating element, I had to force the socket to stay in place while trying to turn it. Amazon sells heating element wrenches that are better suited for heating element removal.

The water heater tank must be full of water BEFORE TURNING ON THE POWER. Turn on the water valve for the water heater and turn on one hot water faucet in your home to let the air out of the tank and water pipes. Close the TPR valve.
The tank must be full before you turn the power back on; otherwise, the heating elements will burn up immediately from not being surrounded by water.
Wait until air no longer comes out of any faucets, only water, before turning on the power to the water heater.
IF THERE IS NO POWER TO THE WATER HEATER
If there is no voltage at the water heater junction box, go to the electrical panel and check the circuit breaker’s voltage. If the voltage readings are not correct at the circuit breaker, tighten the screw terminals on the breaker and try measuring the voltage again.
If there isn’t 240 volts at the circuit breaker, I would remove it and check the voltage at the circuit breaker panel main terminals and the bus bars.
Look at the underside of the circuit breaker to see if there are any indications of burning or arcing. Even if there are no apparent signs that the breaker is bad, it still could be bad.
If the circuit breaker was in the tripped position when you initially inspected it, try resetting it by pushing the handle to the OFF position and then pushing it to the ON position. If the circuit breaker trips again, there is an electrical problem somewhere that needs to be found.
Disconnect the electric water heater at the water heater junction box and cap the bare ends of the wires separately on the electrical cable supplying power to the water heater. Then, go and reset the circuit breaker again to see what happens.
The problem is inside the water heater if the circuit breaker can be reset with the water heater disconnected.
If the circuit breaker trips again with the water heater disconnected, the problem is somewhere in the circuit supplying power to the electric water heater. This could not be easy to locate as the wiring is often inside walls.
Did the water heater shut-down coincide with any recent work done around the house? Did someone hang a painting on a wall and inadvertently drive a nail through the water heater circuit wiring?
The electrical wiring could be very old, and the insulation on the wires could have broken down to create the short circuit, causing the circuit breaker to trip. In that case, new circuit wiring needs to be installed.
Suppose the circuit breaker trips again after resetting, but only after a short duration. In that case, one of the heating elements may have broken down to the point where it leaks electricity into the water in the tank. The resistance of the water in the tank delays the tripping of the circuit breaker because it limits the current flow. Replacement of the defective heating element will correct this.
If you have 240 volts at the main electrical panel terminals and bus bars but not from the water heater circuit breaker, it is likely that the circuit breaker is bad and should be replaced. See the chart below for your electric water heater’s correct circuit breaker rating. Also, confirm that the proper wire size is installed for your water heater.


Depending on your electric water heater’s location, such as in a basement or garage, the electrical circuit may require GFCI protection. This requirement is explained in Article 210.8(A) of the National Electrical Code.
If you only have power on one of the bus bars or main terminals in the main electrical panel, you have a bigger electrical problem. In this instance, other things in your home may not have electricity. Check if any other 240-volt appliances, such as a stove or air conditioner, turn on.
A power failure on one of the main electrical terminals can be caused by a bad main circuit breaker or loose connections on the main breaker, problems at the electric meter, or a problem at the weather head where the power company connects to your house. A problem with the power company transformer could also cause it.
When you find that half of your main electrical panel is without electricity, I suggest you call the power company first to have them take a look. You could call an electrician first, but the power company won’t charge you for a service call, and if the problem is with their equipment, the electrician could not fix it anyway. A lack of 240 volts can cause your electric water heater to not work after getting your water heater working again. If the hot water temperature fades too soon during your long showers, turn up the temperature on the lower heating element thermostat.
The cold water refilling the tank enters the bottom. Having the lower water temperature hotter will keep it warmer as cold water mixes in and makes its way to the upper element and through the pipes.
Once enough hot water has passed through the pipes and the cooler water moving upwards has activated the upper heating element, the lower heating element will be off.


In your home, the metal hot water pipe and the metal cold water pipe must be electrically bonded together. This is accomplished with a short piece of #8 or #6 copper wire and two water pipe ground clamps. Notice the green wire in the photo at the top of this page.
Although the National Electrical Code does not specify where the bonding connection is to be installed, it does require it to be accessible.
Consequently, the bonding connection is usually made at the water heater because it is accessible and it does have the hot and cold water pipes attached. It is also easy for the inspector to find.
The water heater itself is not approved to be used as the bonding connection. A lack of a bonding connection will not cause the electric water heater not to work. The bonding connection is part of the grounding electrode system.
WATER HEATER TROUBLESHOOTING TOOLS
The tools that I use for troubleshooting when I see an electric water heater not working are as follows:
Flathead screwdriver
Philips screwdriver
Set of nut drivers
Lineman pliers
Headlamp
Ammeter
Voltage tester
Category IV Multimeter
MANUFACTURERS TO CONTACT WHEN YOU FIND YOUR ELECTRIC WATER HEATER NOT WORKING
Links to other Appliance-related blog posts on my site can be seen here.
To help keep this website free, please use this Amazon link for your purchases. As an Amazon Associate, I earn from qualifying purchases.
Click here for a FREE copy of my book “Almost Everything You Need To Know To Repair a Bathroom Exhaust Fan In Your Home.”
Get your required “Emergency Disconnect, Service Disconnect” labels and stickers to satisfy the 2023 National Electrical Code requirements in article 230.85(E)(1) and (2) by going to my Redbubble Shop here.
Visit my Link Tree for my social media connections and links to merchandise in my Redbubble Shop.


