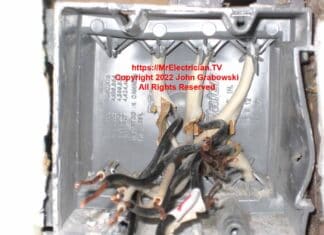
Tag: Four Inch Square Box
Repair A Broken Electrical Box
Dear Mr. Electrician: How do I repair a broken electrical box?
Answer: The best way to repair a broken electrical box is to replace it. Although some products are available that claim to restore the plastic threads, I have not tested them, so I cannot comment on their effectiveness.
NOTE: Some links below go to applicable products on eBay or Amazon. As an Amazon Associate, I earn from qualifying purchases. Using my links helps to keep this website FREE.
BROKEN OUTLET BOX SCREW HOLE REPAIR
A product is available that makes some replacements of an existing broken plastic electrical box unnecessary. I haven’t used it yet, but it is an easy fix to a broken screw hole. Look at the G-Clip for a simple plastic outlet box screw hole repair.
Few options exist for repairing a broken screw hole in a plastic electrical box. My standard choice was to replace the electrical box. The G-Clip provides the option to repair if possible. Sometimes the electrical box is broken more than just the screw hole, so it would need replacing.
See the electrical box replacement below. The original installer of this two-gang plastic switch box used a new-work box for an old-work installation. Screws were driven into the right side of the box. Also, the hole in the wall was too big for an old-work box.
A two-gang old-work box would have been better. However, in this situation, the hole in the wall was cut too big.
REPLACE THE BROKEN BOX
The existing hole in the wall was too big for a plastic old work electrical box to fit. The broken box was a new-work box that someone retrofitted as an old-work electrical box. Note the screw holes and twisted plastic on the right side.
I used my Knipex High Leverage, Diagonal Pliers to slowly cut away the plastic cable clamps without damaging the existing Type NM cable.
A four-inch square, 2 1/8" deep metal electrical box was used for a replacement. Holes were drilled in the side of the box. The center half-inch knockout was removed on the same side as the drilled holes.
A fender washer was used with a number 10 x 1 1.5" sheet metal screw to initially attach the box to the wood stud through the half-inch knockout. This gives you room to adjust the box so it sits even with the front of the stud. Then, more sheet metal screws are added through the drilled holes for strength.
An impact driver was used to drive the screws after using a hammer and awl to start the screw holes.
After removing the old plastic box, the new metal Romex cable connectors were attached to the ends of the existing cables inside the wall. The locknuts were removed.
The appropriate knockouts were removed from the four-inch square box for each cable connector. After each Romex cable was pulled into the box, the locknut was installed onto the end of the connector.
Top Of Page
A four-inch square, two-gang mud ring was attached to the face of the square box. Mud rings are available in...
