Dear Mr. Electrician: What is needed for a bathroom fan repair? The exhaust fan in my bathroom stopped working after making noise for several weeks. Does the entire bathroom fan housing need to be replaced?
Answer: A successful bathroom fan repair begins with having the correct replacement parts. In many cases, a residential bathroom fan motor can be easily replaced.
NOTE: Some text links below go to applicable products on Amazon, eBay, or my FREE Bath Fan Repair Book. As an Amazon Associate, I earn from qualifying purchases. Using my links helps to keep this website FREE.
Quite a few bathroom fans were manufactured by the original installer for a simple and fast installation. Consequently, the parts replacement can be almost as simple.
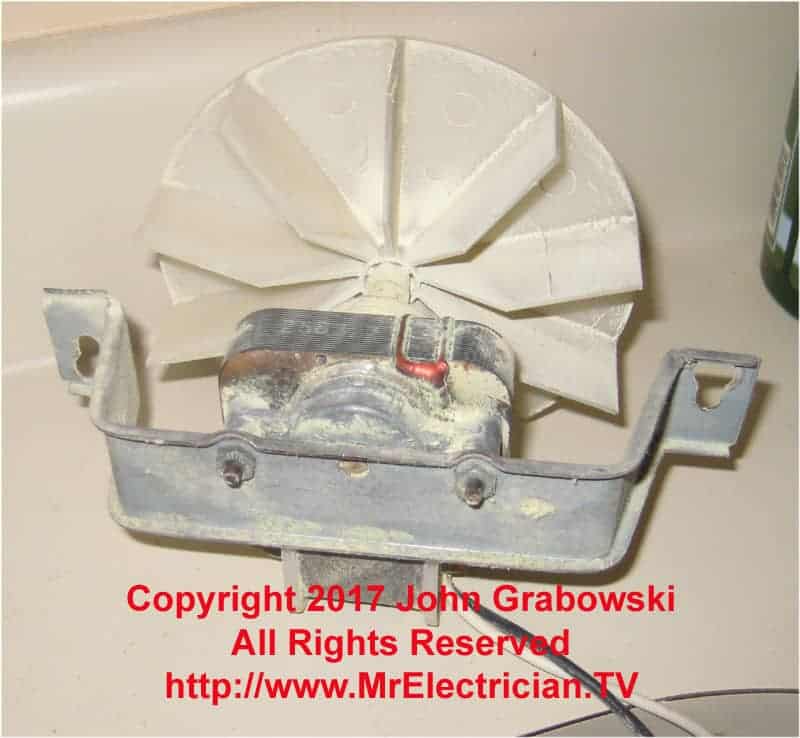
The photo above shows the fan motor held in place with two screws on the support bracket. The bracket slips inside the fan housing (Note the pear-shaped slots). The electricity is connected with a plug. The housing is already grounded from the power supply, so ground continuity is maintained when the motor gets mounted securely.
BATHROOM FAN MOTOR REPLACEMENT
The key to a successful bathroom fan motor replacement is getting the correct replacement parts. Many bath fan replacement parts are available, but identifying the correct parts can be challenging.
Having the bathroom fan model number is the key to obtaining the correct replacement parts. It was labeled inside the housing or on the fan motor support bracket when your bathroom fan was manufactured. It is not the part number on the motor, though that can be helpful and worth writing down. The fan model number may be stamped into the metal, or a label may be glued inside somewhere.
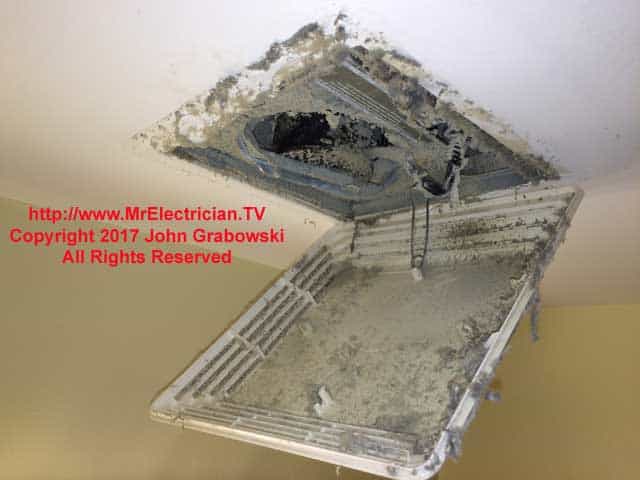
Before working on the fan, put a drop cloth down and wear a face mask and eye protection. Old bathroom fans sometimes have an abundance of dust and dander inside. Use a ladder when reaching up for the fan. Do not stand on the toilet! Please read my post about safety precautions.
When replacing the motor, always replace the fan blade. Don’t try to use the old fan blade with a new motor. It is difficult to remove the old fan blades, which can get damaged. The bath fan motor replacement is sometimes sold as a kit with a bracket, motor, and fan blade.
The factory has a replacement kit for those with a Nutone 696N B Unit bathroom exhaust fan. The Nutone C350BN includes a motor, fan blade, and bracket, all ready to be snapped into place.
Some Nutone and Broan model bathroom fans that your home builder initially installed have a retrofit bath fan upgrade kit to change out the motor, fan blade, and grill while the existing fan housing remains in place. This is the easiest thing to do, and the manufacturer claims an improvement in noise and air movement. The kit is sometimes cheaper than buying the replacement parts.
The bath fan upgrade kit is a Nutone 690NT and can be used to replace motors and upgrade several models of Broan and Nutone fans, but not all. Broan has an identical upgrade kit with part number 690 and a different color box. Nutone and Broan are the same company. They merged many years ago.
CLICK HERE to See Bathroom Fan Motors on Amazon
UPDATE: The 690NT has been discontinued. The replacement for the 690NT is a Nutone Quickkit #QKN60 for 7.5″ x 7.25″ housings. I have not used this model, but photos and details of a Nutone 690NT bath fan upgrade kit installation are below.
I am guessing that the QKN60 will be easier to install as it appears that no pre-assembly is required. Unlike the 690NT, the Nutone QKN60 has a motor already attached to the bracket.
Removing the ladder and cleaning the existing fan housing will probably take longer than installing the new QKN60 fan motor.
The Nutone QKN60 will only fit on model fan housings: Nutone 695 and 696N, Nautilus N671 and N688, and Broan 670, 671, 688, 689.
Sometimes, my most difficult challenge with a bathroom fan motor replacement was getting the grill back on. This is usually because the bathroom fan housing was initially mounted too high above the finished ceiling instead of being flush as required.
I surmised that the original bath fan installer did not know that double drywall or resilient channel would be installed—more about this in my FREE bathroom fan repair book.
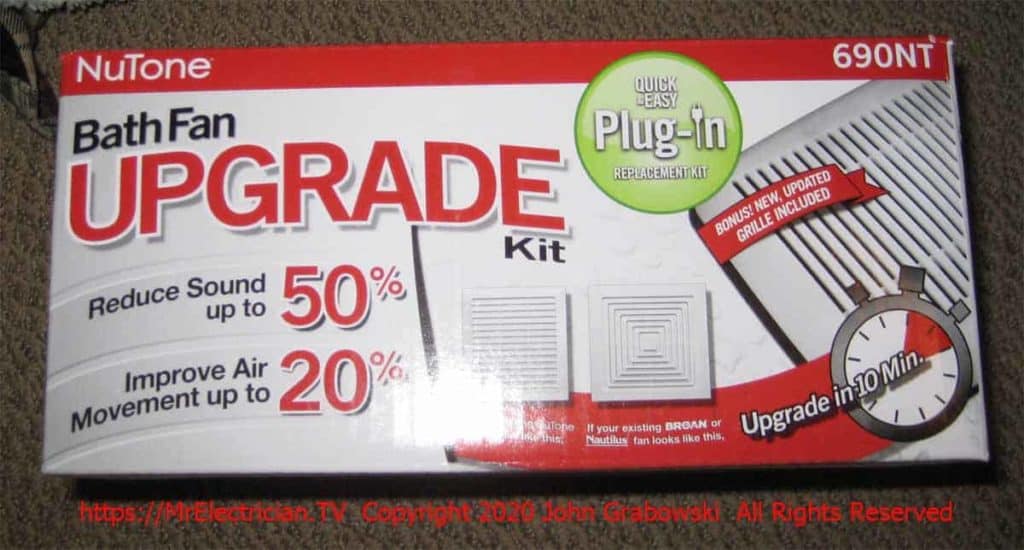
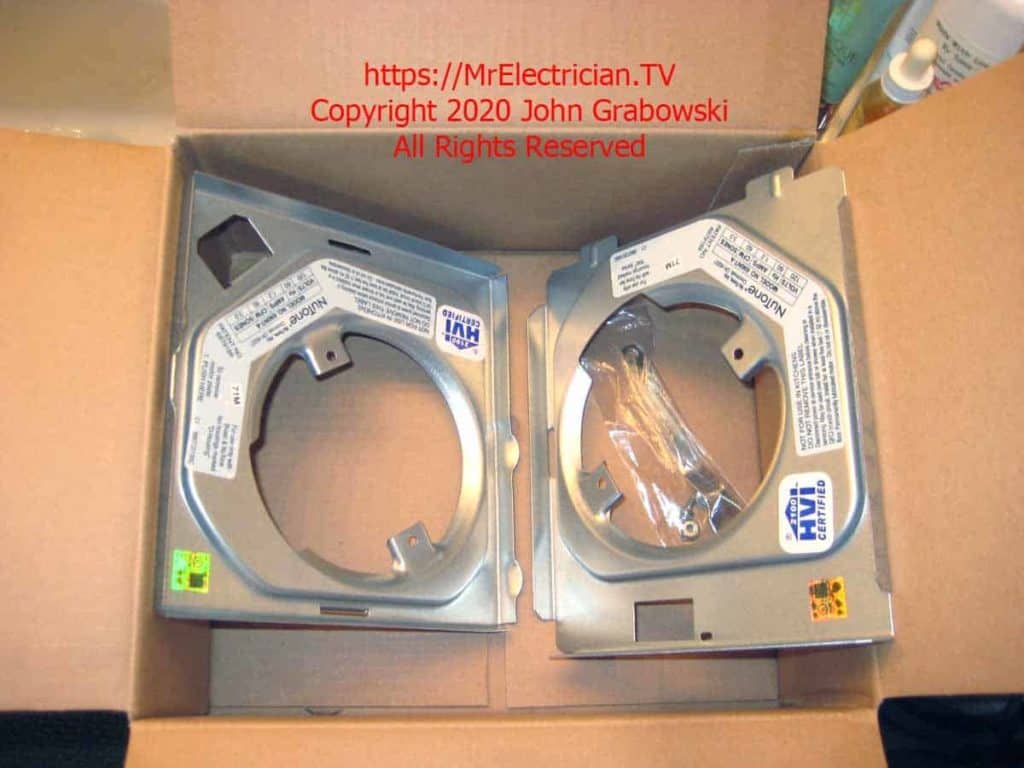
The two mounting brackets and wrench come inside each Nutone 690NT Bath Fan Upgrade Kit. I list all model fans that can be repaired or updated using the Nutone 690NT kit in my book “Almost Everything You Need To Know To Repair A Bathroom Exhaust Fan In Your Home.“.
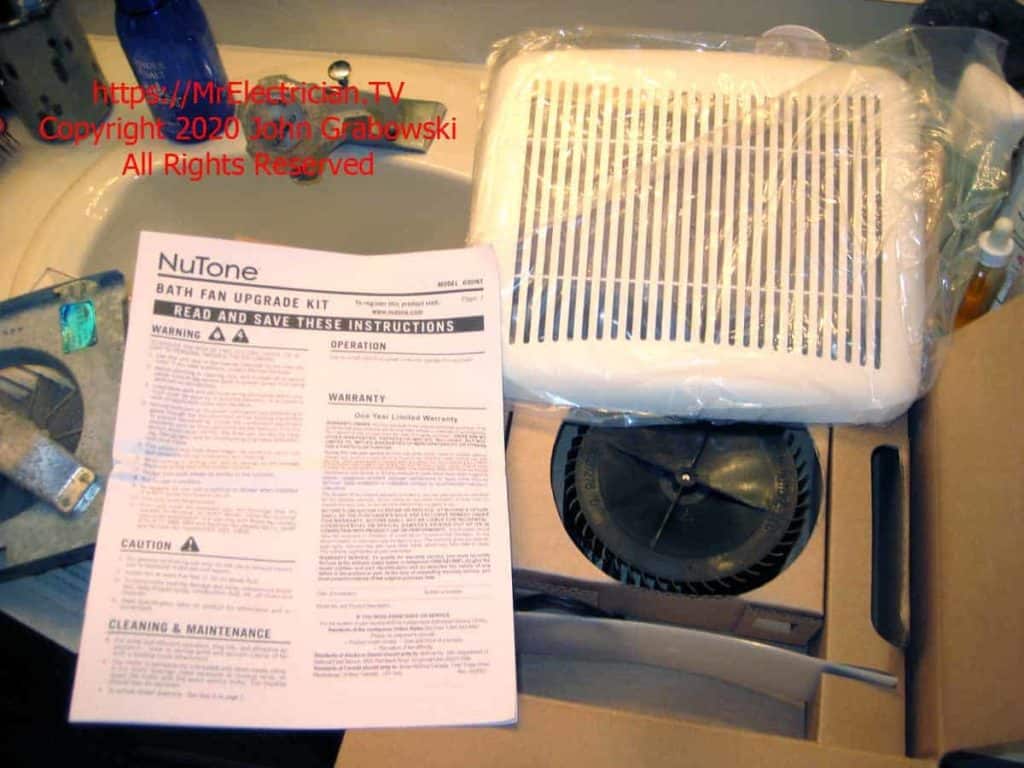
The kit will have instructions, a small wrench, a new motor, a fan blade, a grill, and two mounting brackets. You will attach the new motor onto the new proper size bracket and put it into the existing fan housing in the ceiling. The motor is held in place on the bracket with two nuts furnished with the wrench.
A flexible plastic strip also gets inserted into the housing to direct the airflow.
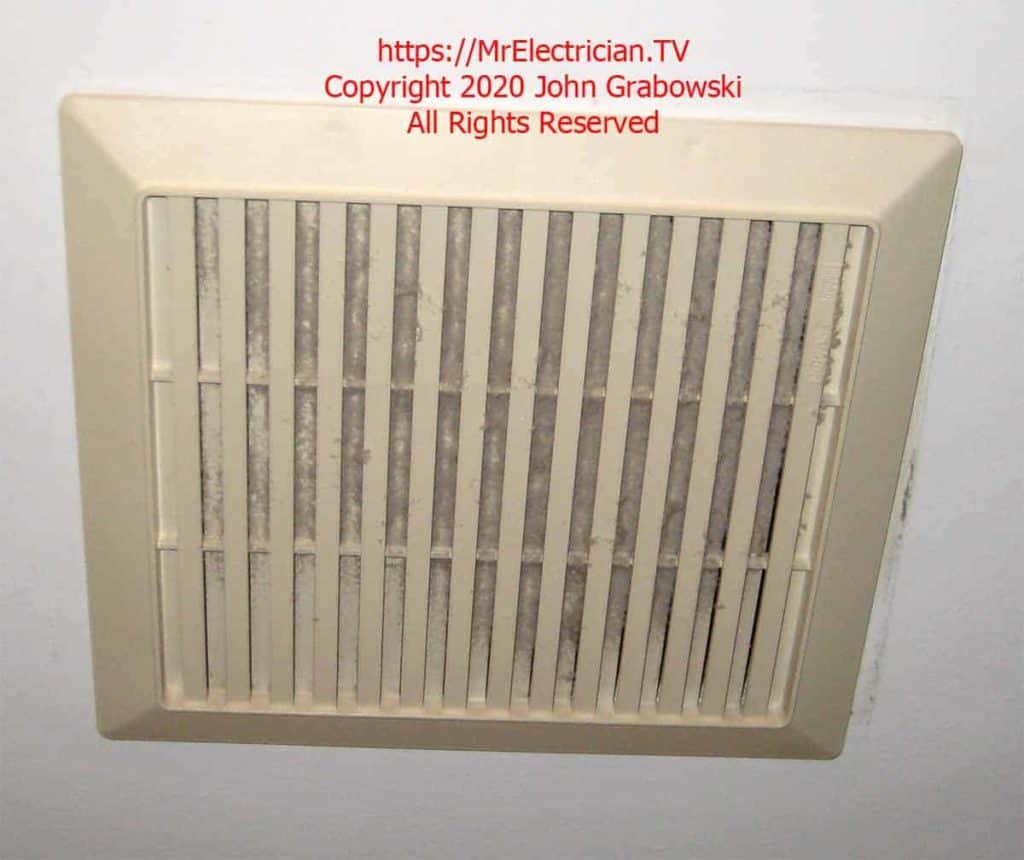
In brief, you remove the existing motor and the attached fan blade, mounted on a metal plate held in place with a screw(s), nut(s), or sometimes just snapped in. The motor unplugs from a small electrical receptacle inside of the housing.
There is no reason to do anything with the electrical wiring when using the upgrade kit. The new motor will plug into the existing electrical receptacle (Assuming there is nothing wrong with the receptacle).
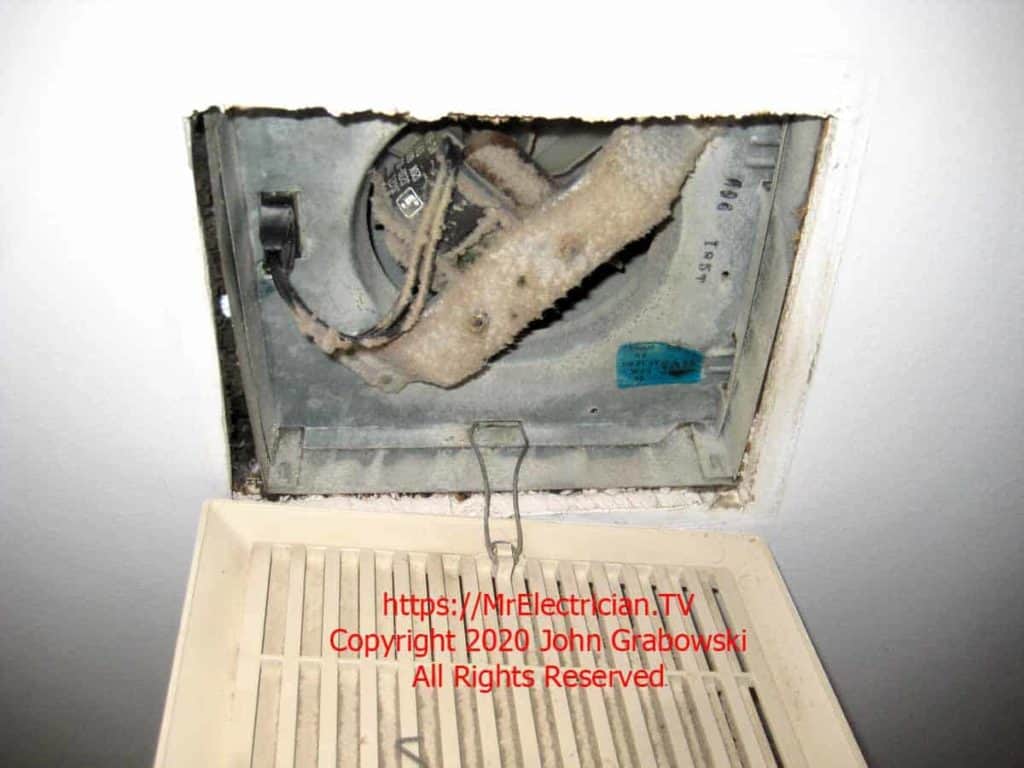
Before installing the new motor, clean the inside of the fan housing and check the backdraft damper to confirm that it moves freely. More information about this simple retrofit is in my repair book.
A visitor to MrElectrician.TV wrote to me about needing a replacement backdraft damper because one of the tabs had broken off. Unable to find a new one, he got the old one working with a coat hanger wire. No further details were provided.
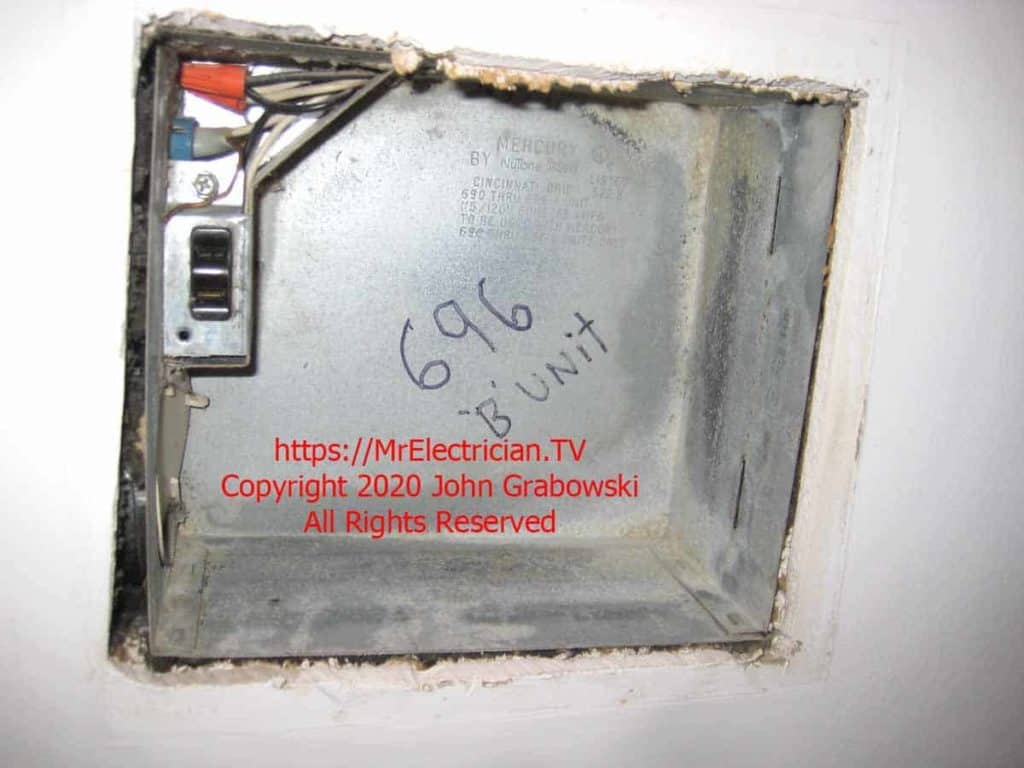
I usually write the existing fan housing model number somewhere in the back.
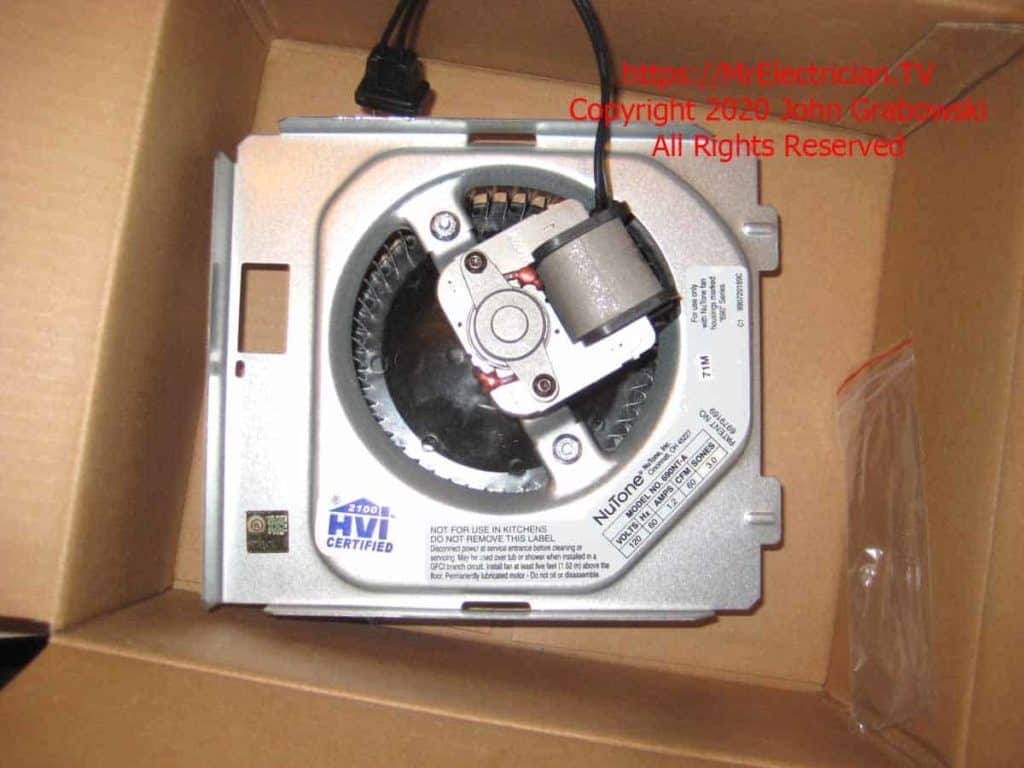
In the above photo, the 690NT motor and fan impeller are fully assembled on the countertop before being inserted into the fan housing on the ceiling.
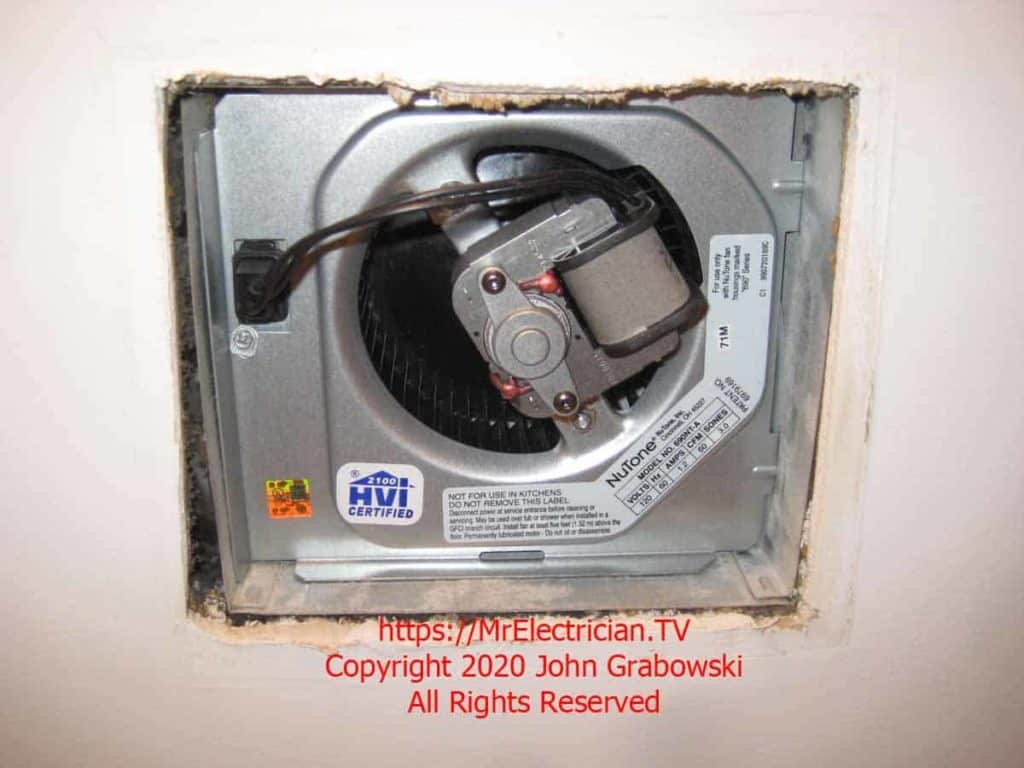
The new mounting bracket has two tabs on one end that slip into the slots in the fan housing. The other side is held in place with one screw next to the electrical receptacle.
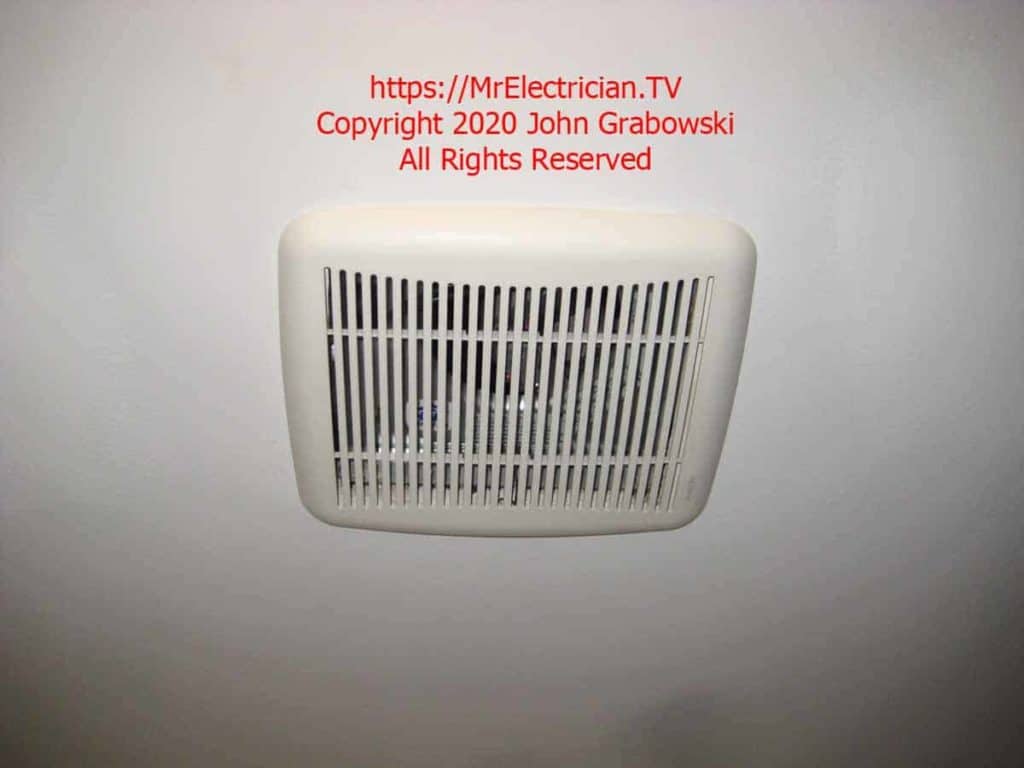
The old bath fan looks like a new model and sounds better with the new motor and grill installed.
See the Nutone 690NT replacement video below:
I remember repairing a customer’s fan that did not have a model number anywhere. I recognized the brand and called the customer service telephone line. I described the fan, and the person at the factory gave me the correct model number and sold me the right parts. After installing the new parts, I wrote the model number inside the housing with a paint pen.
My free repair book provides contact information for most bathroom fan manufacturers.
MY FREE BATHROOM FAN REPAIR BOOK
I wrote a short book about repairing bathroom fans. “Almost Everything You Need to Know to Repair a Bathroom Exhaust Fan in Your Home” is available as a free download by clicking here.
A novice can complete a few simple steps to replace the bathroom fan motor. You need to find the correct replacement parts. My repair guide can help with that.
I also suggest tools that may be needed and safety information. My guide lists the contact information for most bathroom exhaust fan manufacturers and other bath fan replacement parts suppliers.
As an electrician, I have installed, replaced, and repaired many models of bathroom fans. Certain factors contribute to the optimum performance of a bathroom exhaust fan.
There are also a few things that a homeowner can do to maintain a bathroom fan and keep it running for as long as possible. One important tip is to obtain the correct replacement parts when attempting a repair.
A novice can service many bathroom exhaust fans with a few simple steps.
One common problem was prevalent with all the bathroom fans I repaired. Read what it is in my book.
“Almost Everything You Need to Know to Repair a Bathroom Exhaust Fan In Your Home”
Touch Here to Receive Your FREE Bathroom Fan Repair Guide
A Total of 19 Free, Easy-to-Read Pages are divided below:
Safety – When you work around your home, you take the same risks as a professional. It will help if you protect yourself.
Diagnose – Things to check for optimum bath fan performance.
Identify – The correct model number and specifications for your fan.
Repair – How to replace the parts on your bath fan.
Prevention – Get the most extended life from your bathroom fan.
Tools – Tools and materials that may be needed.
Parts – Where to obtain the correct replacement parts.
Glossary – Terms related to bath fan installations.
If you want a better quality bathroom exhaust fan that is much quieter, I suggest a complete replacement with a Panasonic Bathroom Fan. I like the WhisperFit series because they are compact and come with a 3″ to 4″ duct adapter, as Panasonic rates the fan for use with both 3″ and 4″ air ducts.
The Panasonic bathroom fans are made for retrofit as well as new construction. I have done several retrofits with the Panasonic fans, and they all turned out well. However, this is not a job for a novice. Some skills and various tools are needed to replace a bathroom fan successfully.
If you can access the fan from above the ceiling, such as inside the attic or crawl space, the replacement job can be easier if you don’t mind working in an attic or confined space.
You will need tools for cutting the drywall, working with metal ducts, wiring, and some supplies such as metal foil duct tape and flexible air ducts.
An excellent, sturdy ladder to work off of is very important for your safety. Goggles and a headlamp are handy. When climbing in the attic, it is good to have work gloves, knee pads, and a dust mask.
Unfortunately, there is no set method for a complete bath fan replacement. There are too many variables. Some existing bath fans are more challenging to remove than others. Sometimes, the air ducts are crazy.
I found one where water pipes in the ceiling crossed over the fan. I found another where the exhaust air duct from one bathroom connected to the exhaust air duct in another bathroom.
It would be best to determine beforehand what size duct is connected to the existing fan. The best way is to remove the existing fan, as I have seen a 4″ duct connected to a 3″ duct opening on the old fan and a 3″ duct connected to a fan with a 4″ duct opening.
When I replace a bath fan for a client, I bring duct supplies for 3″ and 4″ exhaust air ducts. It’s easier than running out and buying needed supplies during a replacement job.
Remove the electrical wiring carefully. Do not cut the wires. They are all that you have to work with. You may get some slack out of the wiring by removing a staple or two after the fan is out and you have a hole in the ceiling to work within.
In an exemplary scenario, I can replace a bath fan in about two hours. In a bad scenario, it can take four hours or more. The good news is that I did not need to repair or paint the ceiling in almost all replacements. The ones that did need ceiling repair were instances where the homeowner wanted the fan relocated.
CLICK HERE for Your Free Bath Fan Repair Guide
Nutone also has a line of retrofit fans in its Ultra Pro Series.
For information about repairing attic fans, click here.
Please read my post on safety before repairing your bathroom fan.
Read my article about how I re-grouted a shower floor if you plan to renovate a bathroom.
If you run out of hot water when showering, read my article about fixing an electric water heater.
To help keep this website FREE, please use this Amazon link for your purchases. As an Amazon Associate, I earn from qualifying purchases.
Click for a FREE copy of my book “Almost Everything You Need To Know To Repair a Bathroom Exhaust Fan In Your Home.”
Get your required “Emergency Disconnect, Service Disconnect” labels and stickers to satisfy the 2023 National Electrical Code requirements in article 230.85(E)(1) and (2) by going to my Redbubble Shop here.
Visit my Link Tree home page for my social media connections and other links.
