Dear Mr. Electrician: How do I replace a 4-gang electrical meter socket base?
Answer: Replacing a 4-gang electrical meter socket is a multi-step process involving homeowners, property managers, the local power utility company, the town building department, and an electrical contractor.
NOTE: Some text links below go to applicable products on Amazon. As an Amazon Associate, I earn from qualifying purchases. Use my links to help keep this website FREE.
I have replaced over two dozen multi-gang electrical meter sockets. I have also repaired probably the same number by using custom-made new covers and reattaching the meter sockets to the side of the building. I figured out a way to install new plywood behind without removing the old meter base. I also sanded and painted the old ones using Rust-Oleum Rusty Metal Primer and then Rust-Oleum Professional paint.
Below are photos and details from an actual 4-gang electrical meter socket replacement. Included is a list of tools that were used as well as the materials necessary to complete the job.
Table of Contents:
- LABOR TO REPLACE METER SOCKET
- GROUNDING THE NEW FIVE-GANG METER SOCKET
- TOOLS I USED TO REPLACE THE ELECTRIC METER SOCKET
- MATERIALS USED TO REPLACE THE ELECTRIC METER SOCKET
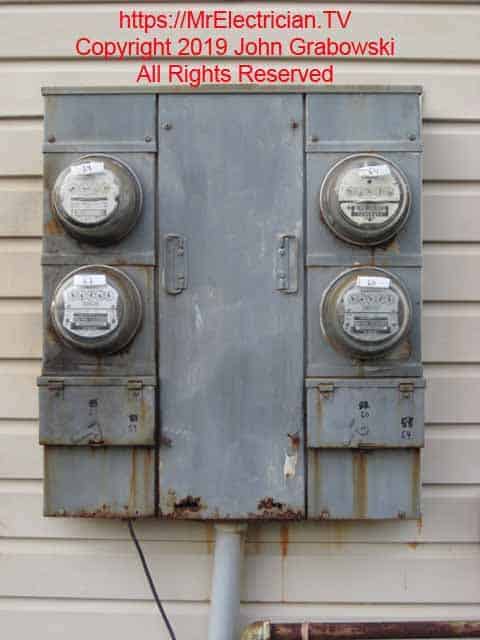
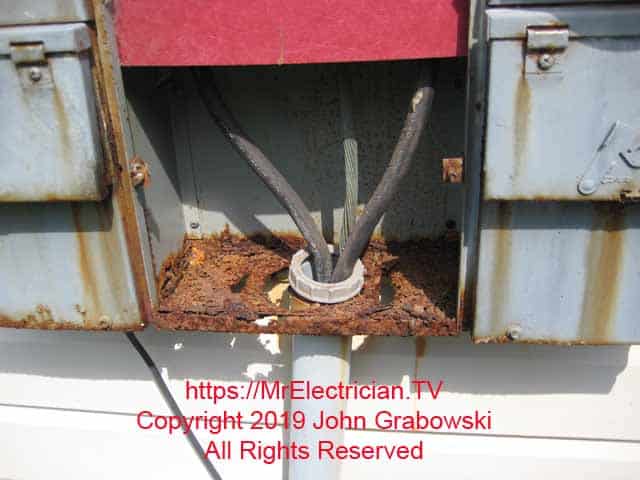
In the photo above, the bottom of the main cover has holes from rust. Water was getting inside the section where the main feeder wires are connected. The cover was rusting from the inside out.
UPDATE: The National Electrical Code article 230.85 requires that all main disconnects for electrical services be labeled “Emergency Disconnect, Service Disconnect.” I have several types of STICKERS available to satisfy this code requirement.

LABOR TO REPLACE 4-GANG ELECTRICAL METER SOCKET
I installed a Siemens Uni-PAK 5-gang electrical meter socket to replace the rusted four-gang electric meter socket on a residential condominium building. The underground electrical service was single phase 120/240 volts with a four hundred amp underground feeder from the power company’s transformer. The individual feeders to each condo were rated for 100 amps.
The underground electrical service consisted of three single conductor wires from the pad mount transformer that were directly buried in the earth. They were sleeved with 2″ PVC conduit going up from the ground into the electric meter base.
A new four-gang electrical meter socket base is a vertical stack that would not line up with the existing tenant feed cables. I had to use a five-gang electrical meter socket to line up with the existing cables that delivered power to each dwelling unit in the building.
For the entire job, I figured about 40 person-hours of labor, which included the permit application, call for a property markdown, making arrangements with the power company to have the electric meter locks removed ahead of time, disconnecting power when needed, purchasing and delivery of materials.
Additionally, labeling of existing tenant load wires, driving two new eight-foot ground rods, digging a trench and burying the new grounding electrode conductor, mounting the intersystem bonding termination, pre-cutting and painting of the new meter base backboard, and advance notification to all of the dwelling unit occupants about the power outage due to work being done.
And finally, the removal and disposal of the old multi-gang meter socket, installation of the new 5-gang electrical meter socket, the electrical inspection, and the client’s billing with an invoice for final payment.
CLICK HERE to see Multi-Socket Electric Meter Bases on Amazon
When I submit my electrical permit application to the town building department, I include a short one-page typed “Scope of Work” statement, briefly explaining what work will be done. This gives the electrical inspector a better idea of what is going on. If something is wrong, it is better to find out before work commences rather than fail inspection after the work is completed.
On this electric meter replacement job, the power company required the work to be inspected before reconnecting the electrical power at their transformer. So, in addition to all the other planning for that day, I had to arrange for the electrical inspector to show up at the expected work completion time.
Around ten days before starting the meter socket replacement work, I would tack a notice to the front door of the affected condo or apartment so that the occupants had time to plan to be without electricity. I included my phone number in case there were questions or conflicts.
The actual time spent just removing the old 4-gang electrical meter socket and installing the new Siemens 5-gang meter socket base was approximately 3 hours using three experienced electricians.
We generally remove as much from the old 4 gang meter socket as possible while waiting for the power company to disconnect the power at their transformer. Covers and circuit breakers are easily removed while the cabinet is live.
On one or two occasions, the meter sockets were in such bad condition that I had everyone wait until the power was off before working on them. Safety first.
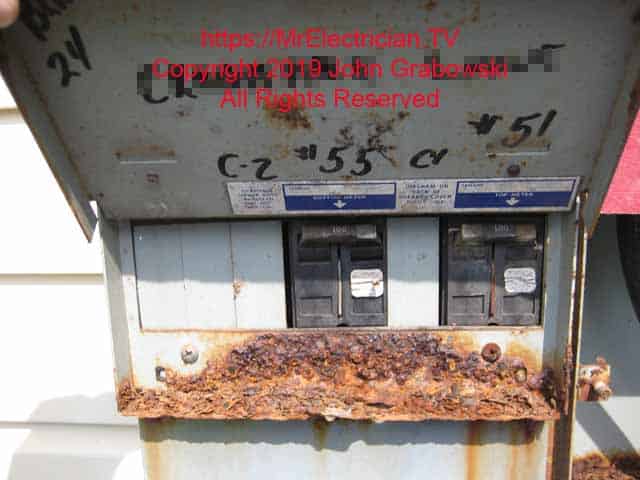
The above circuits were live and in use at the time of this photograph.
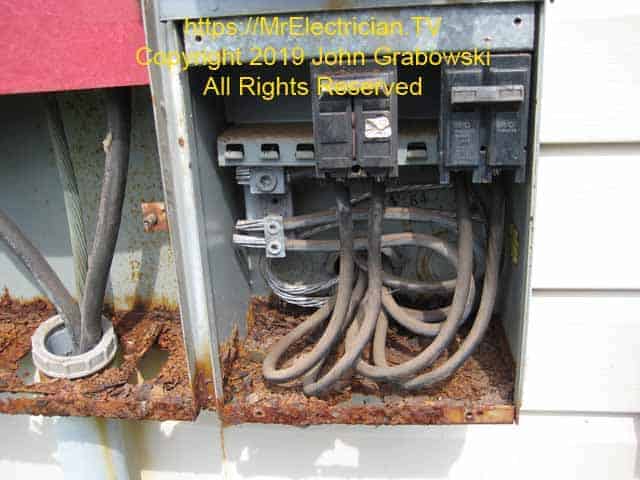
The existing tenant load wires, which provided power to the condos, were in good working condition, though dusty. Splices are made with split bolt connectors when they are too short to connect to the new main circuit breakers.
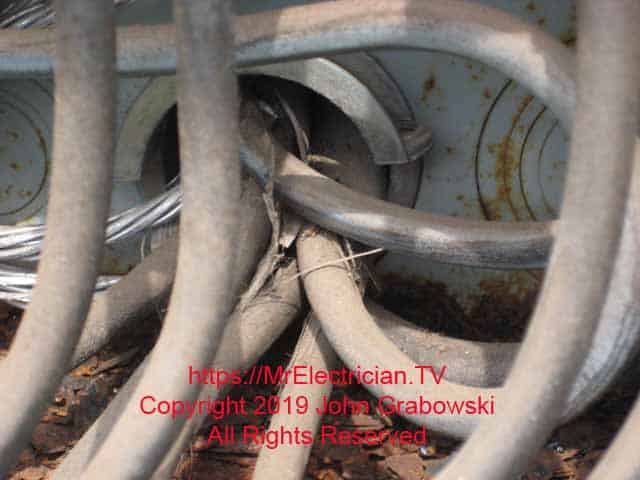
The original installer used a 2″clamp-type connector installed backward without a clamp to protect the wires from the sharp metal edge of the knockout.
In the new installation, I used 1 1/4″ chase nipples with locknuts and plastic bushings for each tenant load cable. The 1 1/4″ holes were made using a knockout punch because the factory-installed concentric knockouts did not align with the existing wires.
The culprit that causes the rust and the aging meter socket to pull away from the building is water. I have found on a few of these meter bases that the top hub cover was not installed correctly and was not caulked. This allowed water to leak in.
Some other meter bases were only mounted to the side of the building using drywall screws that rusted from moisture in the air. Other times water was getting behind the meter socket and caused the back side to rust and the wood underlayment to rot.

This particular 4-gang electrical meter socket was initially installed using drywall screws. Drywall screws should never be used for anything other than drywall. The screws rusted, and as the wood siding became soft from water, the screws pulled out. This led to water getting onto the back of the meter base. There does not appear to be any evidence of caulking along the top from the original installation.
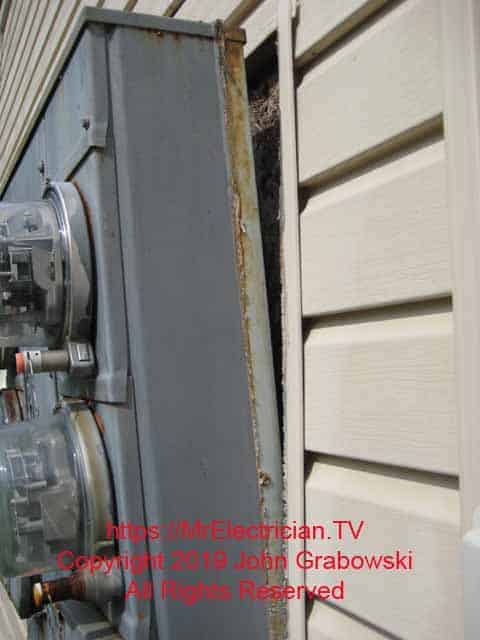
You can see the remains of caulk that had been applied to the sides of the meter base many years ago. If new mounting screws had been installed a few years before and new caulk applied to the top, this meter socket base would not have to be replaced.
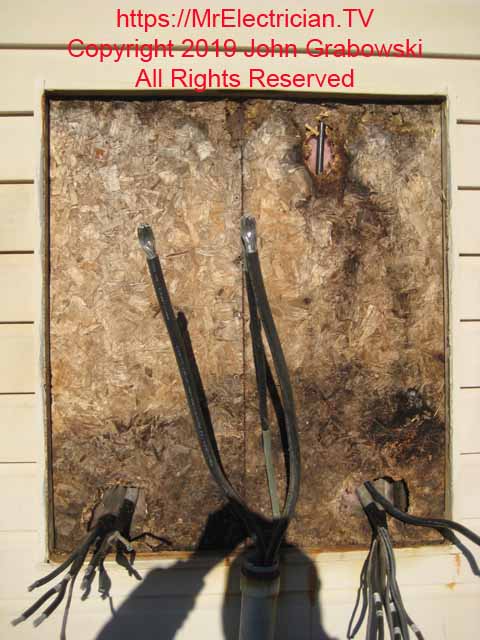
With the wood underlayment rotten from water, installing a new backboard screwed directly onto the wood studs was necessary. On one or two occasions, I found that part of a wood stud was also rotted away. In those instances, I had to install a 2″ x 4″ against the side of the existing wall stud and screw it high and low where there still was good wood.
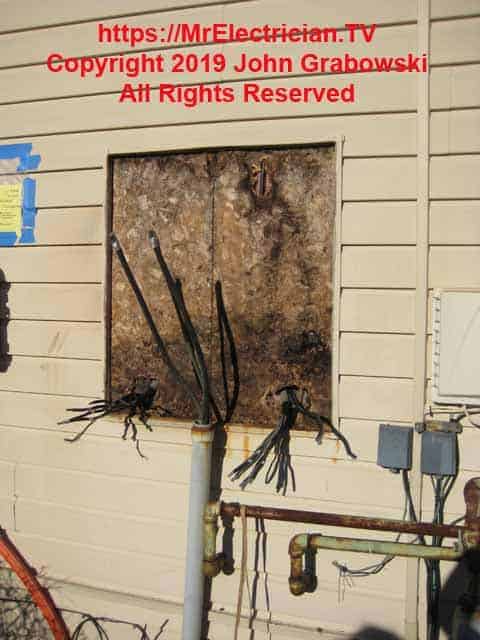
In the picture above, the black mold stain shows how water settled at the lower section of the wood underlayment. Notice at the top, just to the right of the center. You can see the water pipe bonding conductor through the hole in the underlayment.
This grounding conductor was used to bond the building’s interior metal water piping to the grounding electrode system. The underground water service pipe to the building was non-metallic. The single ground rod was the only earth ground.
You can see on the left the electrical permit inside of a plastic bag taped to the side of the building.
