You are on page 2. Click for page 1
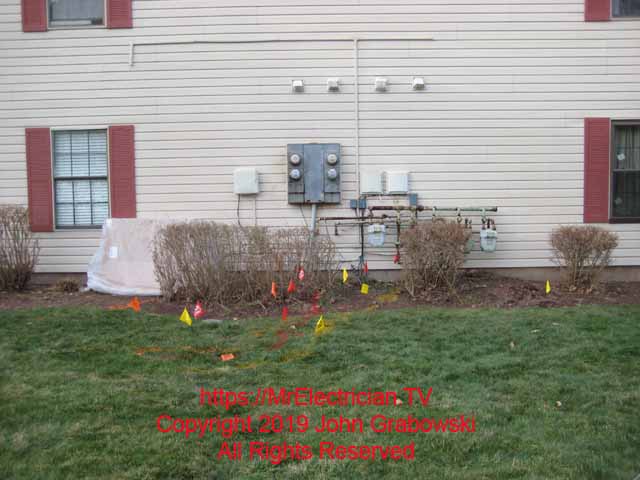
The building was built in the 1980s. With proper maintenance, there would have been no need to replace this 4-gang electrical meter socket box.
The gas piping is very close to the electric utility and would probably not be allowed today. The gas pipes look as though they could use some maintenance as well. The new meter base in a box is on the left side between the bush and the window, covered with a plastic sheet.
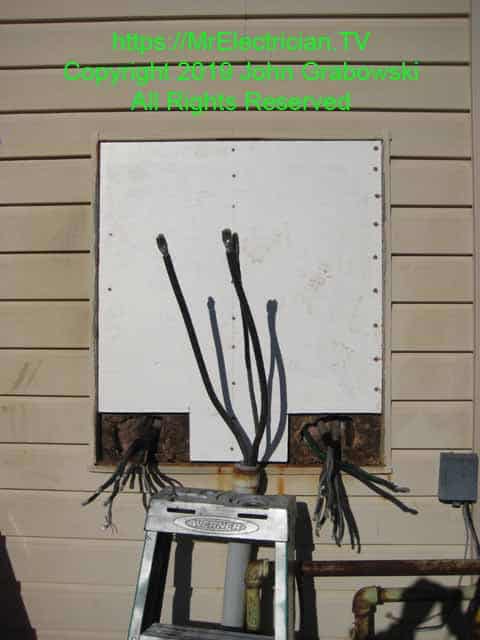
The new board was installed using primed deck screws. I also caulked the top and sides of the opening before putting the new board in place.
We had to be careful with the length of the screw we used, as some tenant feeder wires pass through the vertical wood studs.
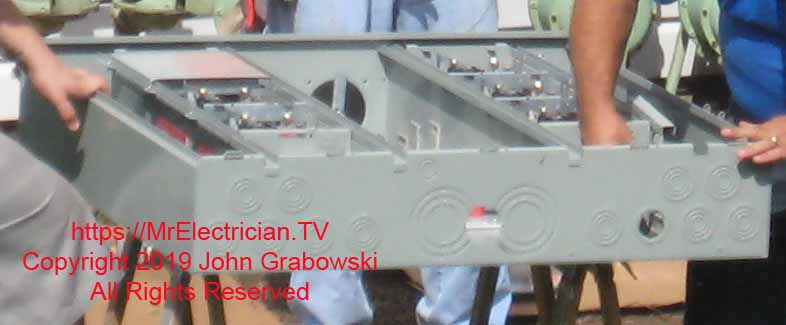
A two-inch (trade size) hole was made in the bottom with a knockout punch to accommodate the existing 2″ PVC conduit coming out of the ground. 3″x 2″ Reducing washers were used to protect the concentric knockouts from breaking loose. This photo is from a different meter base replacement in the same neighborhood.
Temporary power for our tools is usually derived from another nearby electric meter base circuit breaker or a willing homeowner. A portable generator could also be used for temporary power. Some of my power tools were battery-powered, so I had extra fully charged batteries.
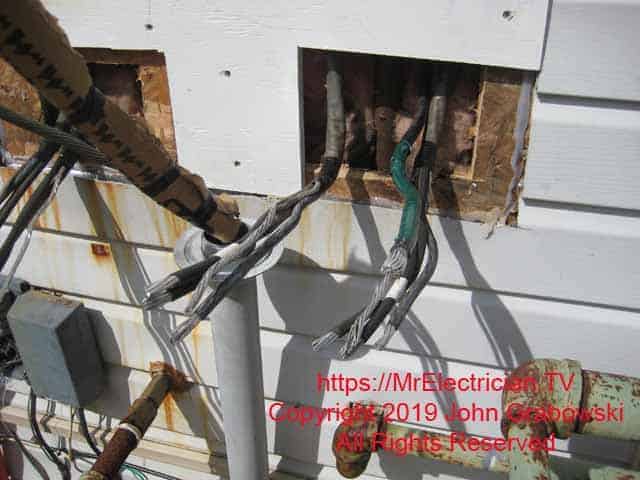
A reducing washer is sitting on the PVC conduit connector, ready for the new meter base. The #2 aluminum wires were too short to reach the new main circuit breakers. Short pieces of wire were added using split bolt connectors rated for aluminum wrapped with rubber tape and vinyl electrical tape. The above photo is from a different meter socket replacement in the same neighborhood.
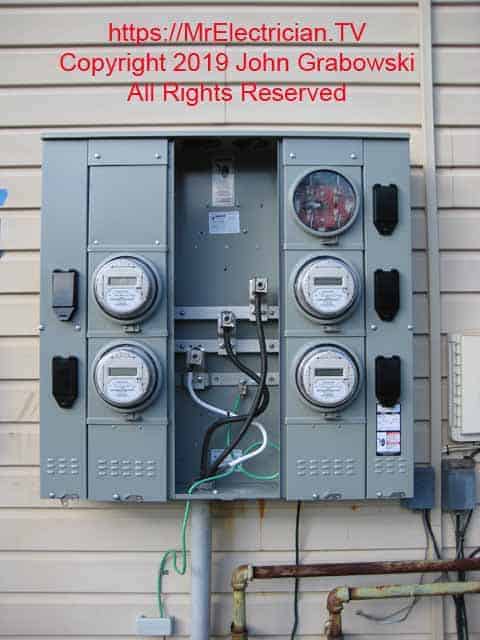
Note the new intersystem bonding termination to the left of the PVC conduit. A five-gang electric meter base accommodates the existing tenant load wires. Four-gang meter socket bases are only available as a vertical stack now.
When the power company returned to restore power from the transformer, a meter person also arrived and installed brand-new electric meters. Stick-on numbers were added later on the black circuit breaker covers to indicate which breaker and meter were for each condominium.
To help preserve the new 4-gang electrical meter socket installation, I caulked the top where it meets the building with a clear outdoor gutter and flashing silicone caulk. I also caulked around the top hub covers. Those are the two areas I have found that water is likely to enter.
The 23/32″ CDX plywood backboard was primed and painted a few days before. I always cut the board and have it primed and painted days before the replacement work so we could focus on restoring power as quickly as possible.

The meter person from the power company put the new seals and locks on after installing the new electric meters. After taking this photo, I added stick-on numbers to the black circuit breaker covers.
GROUNDING
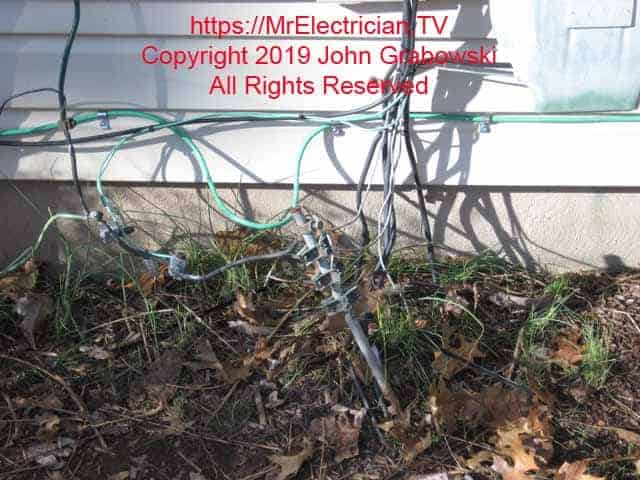
I left a loop of #4 green grounding conductor wire above in case the other utility companies wanted to connect to that rather than the intersystem bonding termination. You can see that multiple clamps from TV and telephone utilities were attached to the old ground rod.
Because the ground rod was the only connection to the earth, I installed two new ground rods at least sixteen feet apart. I also kept the connection to the existing ground rod because other utilities were connected to it. I installed an intersystem bonding termination but left it for the different utility companies to make their connection to it.
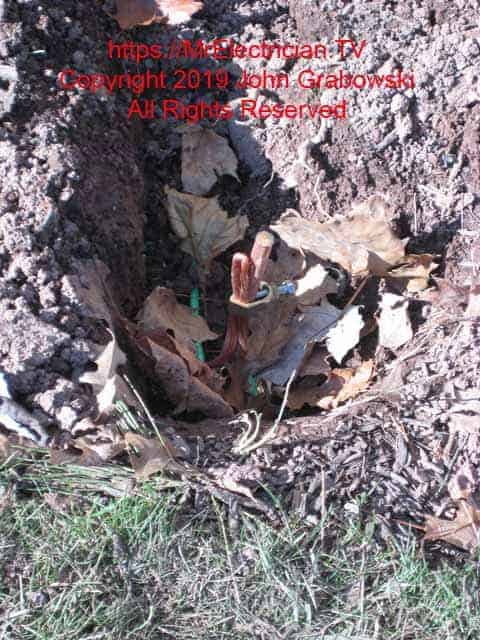
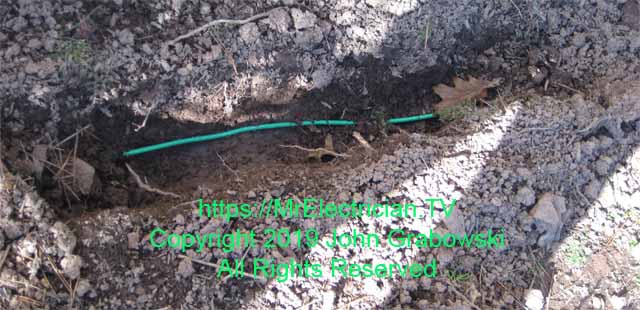
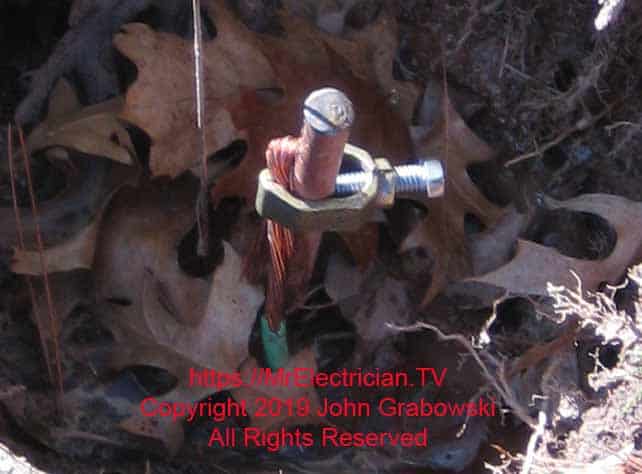
I doubled the wire end over for better contact. I drove the ground rods and put the grounding conductor in the ground a few days before, so we could focus on restoring power to the building as quickly as possible. I used a rotary hammer with a ground rod driver attachment to drive the ground rods.
For more details about ground rod installation and the grounding electrode system, click here to read an article I wrote about.
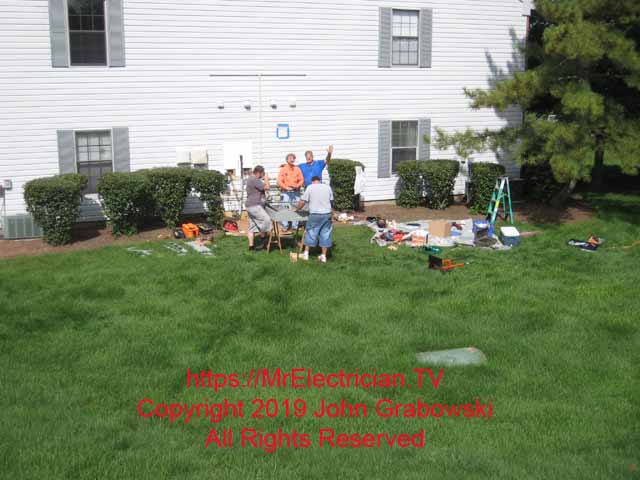
I always laid down a cheap, lightweight plastic tarp to keep the tools and materials from getting lost and wet.
TOOLS I USED
Tools on hand for the electrical meter socket replacement included a hydraulic knockout punch set, hole saws, reciprocating saw, circular saw, oscillating multi-tool, cordless pistol drills, cordless angle drill, caulk gun, and impact driver. Also needed was a socket set, ratchet, and torque wrench to tighten the electrical connections.
Allen wrenches were used in addition to lineman pliers, Knipex high-leverage diagonal pliers, screwdrivers, Channellock pliers, Half round files, a knife, a four-foot ladder, and a work table.
Also used were a shovel, 4″ trench shovel, pick ax, pry bars, paint brushes, wire brushes, sandpaper, painter’s scraper to remove the old caulk, extension cords, GFCI portable outlet box, goggles, gloves, and a hand truck. I had bolt cutters and a large crimper available if needed.
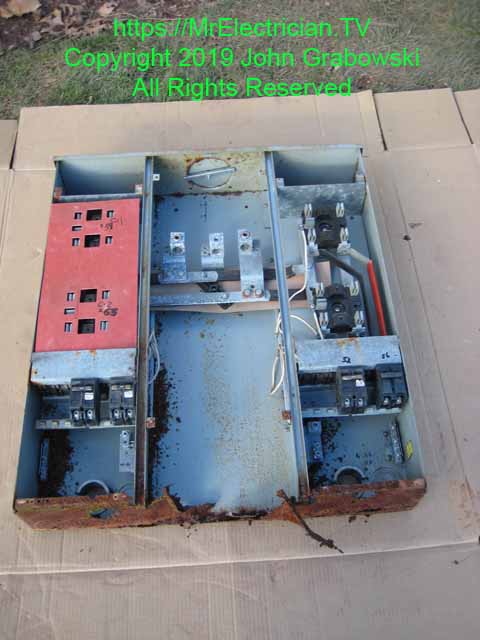
The rusting pattern inside shows that water mainly entered from holes in the back rather than from the top cover. However, I have also seen instances where the top cover was the culprit.
MATERIALS USED
Materials for this job included one 5-socket electric meter base – Siemens Uni-PAK #SP4511RJB (I think this Part Number has Changed), four two-pole 100 amp Siemens main circuit breakers (Type Q2100H), exterior wood primer, exterior wood paint, 23/32″ plywood, two ground rods, two ground rod clamps, #4 copper grounding wire, #2 aluminum THWN, aluminum rated split bolt connectors, rubber tape, black vinyl electrical tape, aluminum anti-oxidant compound, four 1 1/4″ chase nipples with locknuts and plastic bushings, one 3/4″ chase nipple with locknut and bushing for the ground wire entering the rear, 2″ and 2 1/2″ primed deck screws.
In addition, 1 1/2″, 2″, and 2 1/2″ x #12 sheet metal screws, GE silicone II Gutter and Flashing caulk, Intersystem Bonding Termination, small cable straps for the ground wire, a button Romex connector for the ground wire, green electrical tape, white electrical tape, fender washers, stick-on numbers, foam backer rod, a cheap plastic tarp for grass cover, pieces of wall insulation to stuff into the wall, and duct seal to fill the chase nipples to reduce the amount of cold air going into the wall. I also had a can of Rust-OLeum industrial gray spray paint for a touch-up.

I made a short video about this four-gang meter socket replacement here.
Click for information about Siemens 4 gang electrical meter sockets.
My post on concentric knockout removal may be helpful to you.
See my blog post about Special Electrician Tools.
The National Electrical Code article 230.67 requires installing a surge protector on residential electrical services. Also, read article 242. Read my article about their installation here.
There is a FREE online, read-only version of the National Electrical Code. Click here for the link.
Visit my Link Tree for social, sticker, and merchandise links.
Read my article about emergency disconnect stickers for labeling your electrical service equipment.
