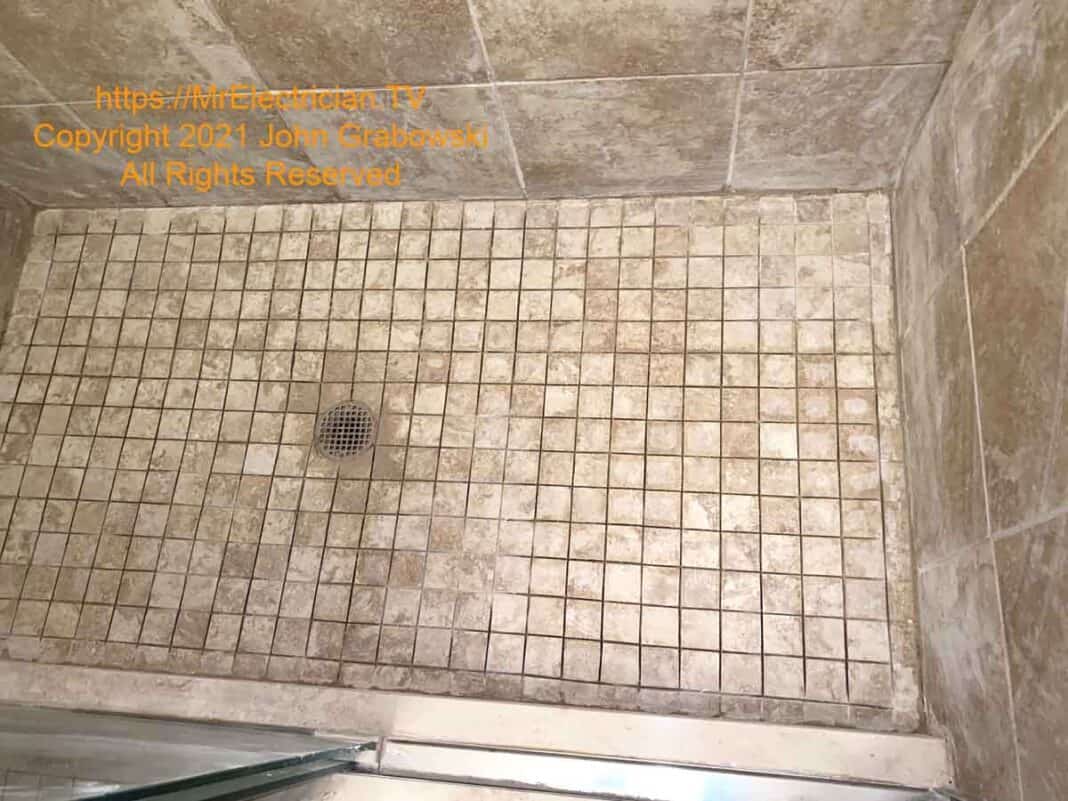
How I re-grouted a shower floor for the first time is a story I thought would benefit some of MrElectrician.TV’s visitors who want to learn how to re-grout their shower.
Table of Contents:
- Components of Epoxy Grout
- Removal of The Old Grout
- How I Re-grouted The Shower Floor
- Tools Used For Re-Grouting
- More Information About Epoxy Grout
NOTE: Some text links below go to applicable products on Amazon. As an Amazon Associate, I earn from qualifying purchases. Using my links helps to keep this website FREE.
Re-grouting a shower floor is not something I would normally do for someone other than myself. I am only equipped with tools and materials for electrical work.
This particular shower floor re-grouting project was initially intended to be done by a tile installation contractor. However, it was tough to find one who was available.
A highly recommended handyman who does re-grouting was called, but he was unwilling to re-grout this shower.
The handyman did not want to re-grout this shower floor because the specifications called for installing Laticrete Spectralock Premium Epoxy Grout. He only had one experience with it, and according to him, it did not go well. He was willing to remove the old grout and gave a ridiculously low price.
COMPONENTS OF EPOXY GROUT
Laticrete Spectralock Premium Epoxy Grout is unique because it consists of three components that must be mixed and used within a limited time frame.
The Laticrete epoxy grout also requires household vinegar mixed with water for clean-up.
The grout bucket with parts A & B is packaged with latex gloves, a tile sponge, and two packets of clean-up powder to be mixed in with your clean-up water. Instructions on how to mix and apply the grout properly are also included.
Part C is the colored sand that is added after parts A and B are mixed together. It must all be thoroughly mixed to a cake batter-like consistency.
For the 36-inch x 60-inch shower floor, I needed two Spectralock 0.2 US gallon (0.7 Liter) mini kits containing Parts A and B. In addition, I needed two part C’s 2-pound (.9 Kilograms) colored sand packages. The color chosen is mushroom.
Click here for an estimating tool to calculate how much grout will be needed for your tile.
GROUT REMOVAL FROM A SHOWER FLOOR
It turned out that the handyman’s low price only called for removing the loose and broken grout. It was an extra hourly rate for another hour and a half of labor to do the entire 15-square-foot floor (3′ x 5′). Even then, he could not remove the grout from the tiles next to the wall because his power tool could not get close enough.
The handyman cut out between the tiles with a small cordless circular saw with a diamond blade. It did an excellent job of removing the old grout, but he also nicked a few tiles with it. The 2″ x 2″ matted tile had 3/16″ wide grout joints; however, the installed tile joints were slightly closer due to the shower floor slope.
So, I had to remove some additional grout before starting the installation.
My first step in the planning process was to determine which grout removal tools to use. I already owned an electric Dremel rotary tool and a RotoZip rotary tool with a circular saw attachment.
In addition, I have an electric oscillating multi-tool.
I purchased a hand grout saw and a grout removal tool with a triangular metal piece on the end.
I also bought a grout removal blade for my oscillating multi-tool and, a 1/16″ (Dremel #569), and a 1/8″ (Dremel #570) sized grout removal bits for the Dremel rotary tool.
The grout saw was helpful for grinding the old grout out of the joints, but it required a lot of hand work, so I wore leather work gloves when I used it.
The handle with the triangle on the end was not very useful for removing the old grout. Due to the triangular shape, it has a limited depth range, and care must be taken not to scrape the tile edges.
I removed most of the grout near the wall using the Dremel rotary tool with the 1/16″ grout removal bit. I kept it at the lowest speed and used two hands to steady it. The Dremel grout removal bit quickly ate right into the old grout.
I would do short bursts of grinding out the old grout and then switch to vacuuming the dust and debris. I wanted the joints to be as clean as possible.
I used a Bucket Head vacuum with the Ridgid Car Cleaning accessory kit for sucking up the old grout dust.
I also used a painter’s tool to scrape out the loose debris inside the tile joints.
The grout saw was used to smooth over the rough spots on the old grout joints after using the Dremel.
I placed small, cordless portable work lights on the floor so that I could see what was going on.
I also wore a headlamp, but the Duracell portable work lights illuminated the work area well.
There was moisture where the old grout was removed, so I waited a week for the shower floor to dry completely before installing the new grout.
After a week passed and the shower floor was dry, I scraped the previously ground-down grout joints with a painter’s tool to remove any remaining debris.
I also used a small wire brush to loosen any stuck particles. I then vacuumed the entire floor and joints.
Top Of Page
HOW I RE-GROUTED USING SPECTRALOCK EPOXY GROUT
I had worked with Laticrete Spectralock Premium Epoxy Grout several years before when I remodeled my bathroom. I liked that it is maintenance-free and that no sealing is ever necessary after installation. The epoxy grout is very durable and stain—and mold-resistant.
I mixed and applied the epoxy grout. I spent about six person-hours (In addition to the eight for grout removal), prepping, mixing, applying the grout, wiping the excess grout, and doing a complete clean-up.
Epoxy grout is a little different to work with than regular grout. It has less working time, and you must use the included wash packets or vinegar in your rinse water to keep the epoxy from gumming up the tile sponge.
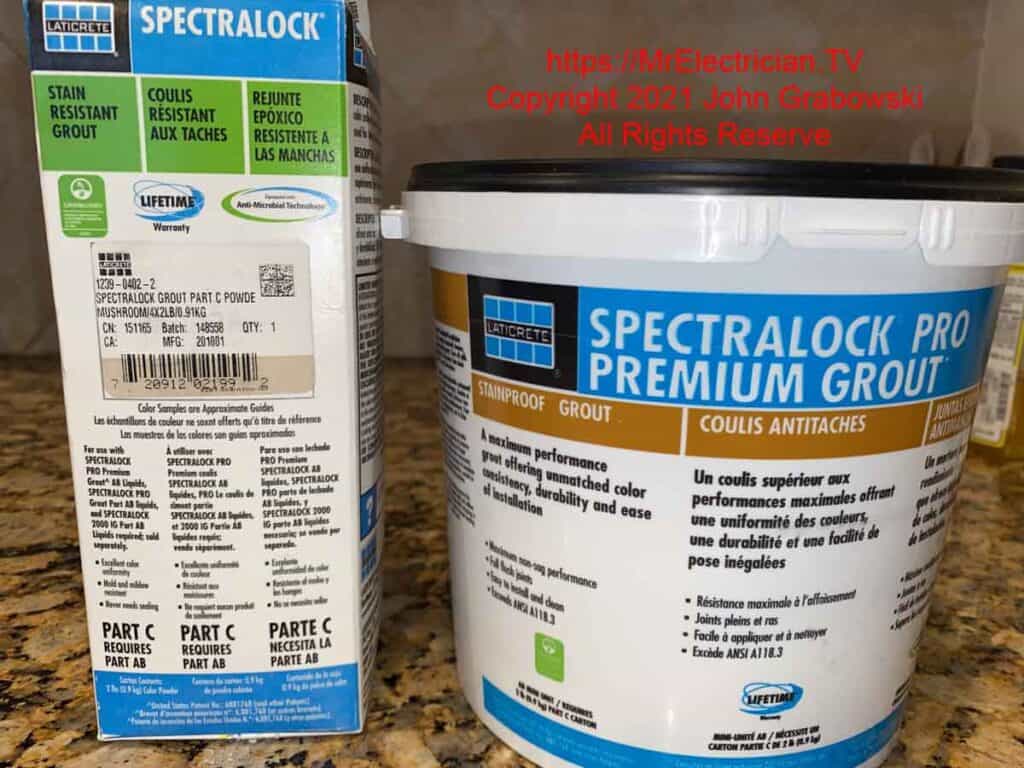
A grout float made for epoxy grout must be used. The manufacturer furnishes gloves, a sponge, instructions, parts A and B epoxy packets, and two cleaning solution packets inside the mini-unit plastic bucket kit. The grout color comes in another separately purchased carton (Part C).
Parts A and B mix together very quickly as two liquids. Part C, colored sand added for body and color, requires more effort to mix into the epoxy base.
I did all the mixings by hand using a margin trowel and did not need a power tool. However, I only mixed one small pail at a time. A power mixer would be needed for a larger bucket.
The grout’s working time is 80 minutes at a room temperature of 70 degrees Fahrenheit. It will be shorter if the temperature is warmer.
In addition to what was inside of the epoxy grout kit, I had on hand a bottle of vinegar, goggles, canvas drop cloth, a margin trowel, dust mask, portable work lights, three plastic 5-gallon buckets each with two gallons of water, clean rags, and one large tile sponge of my own.
I also had to buy an epoxy grout float tool to press the epoxy grout into the tile joints. With the latex gloves on, I used my finger to smooth the corners.
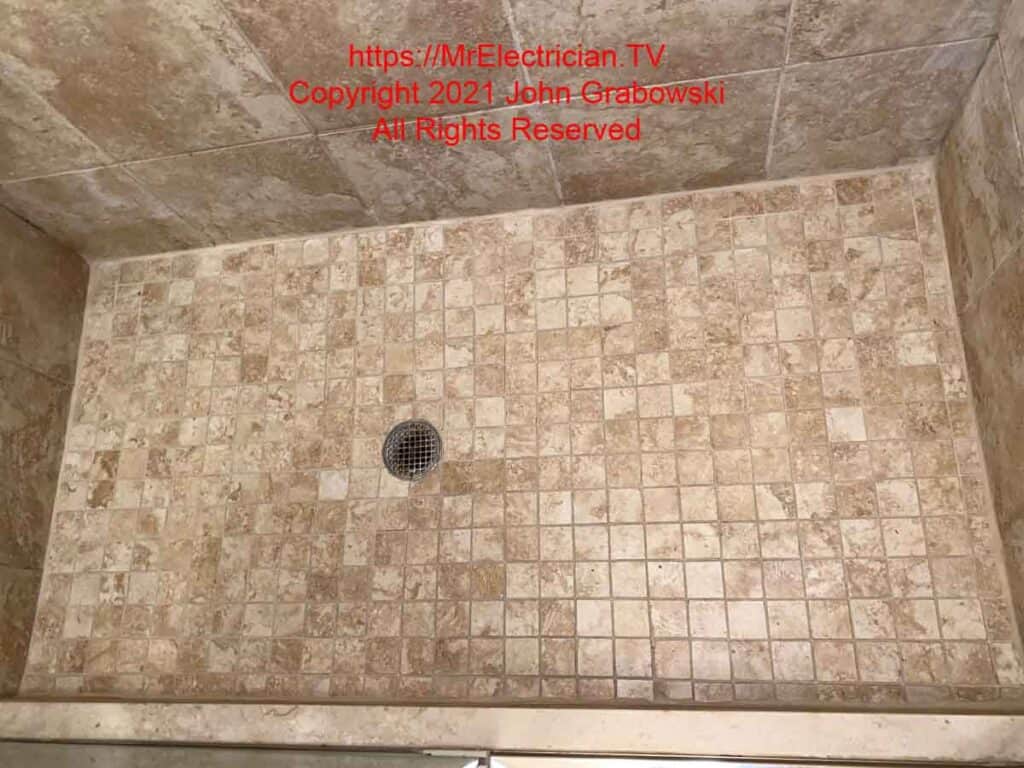
If you plan to re-grout, allow enough time to do it right. Between the handyman and me, the grout removal took about eight person-hours.
If you are not used to it, this is back-breaking work. You are mostly on your hands and knees. You will need knee pads.
Before the new grout can be installed, the grout must be loosened from the joint, and dust and debris must be removed.
If the old grout and floor are wet, wait several days for everything to be completely dry before installing the new grout.
You must begin applying the epoxy grout to the tile immediately after mixing. I recommend that you make all the preparations beforehand so you can immediately start grouting after mixing. That includes having the buckets of water ready for the clean-up part.
Have everything on a canvas drop cloth or plastic tarp to avoid damaging the prep space floor.
Working in a small, confined space on my knees was uncomfortable and sometimes painful. I had a folded-up canvas drop cloth on the shower floor to soften the human-to-tile contact points.
A furniture pad would have been more comfortable but difficult to work with since I had to keep moving around to get into the grout joints with the tools and vacuum.
I wore my Skillers pants with built-in knee pad pockets during the old grout removal and new grout installation.
I found that having the knee pads inside the pants pockets is more comfortable than wearing separate knee pads around the outside of my pants. I also never have to readjust them during the day, though my pants require occasional readjusting.
I don’t think Skillers work clothes are sold in North America anymore. I know they are sold under a different brand name in Europe. However, Amazon has various other work pants with built-in knee pads.
The curing time for the Spectralock Pro Premium Epoxy Grout is fourteen days at 70 degrees Fahrenheit. It will be shorter if the temperature is warmer. For the 2-inch square floor tile 3 feet wide x 5 feet long, 1.5 buckets of grout were used. The tile thickness was 1/4″, and the grout joints were 3/16″ or slightly less due to the slope.
I used two mini-units of 0.2 gallons (0.7 liters) of Spectralock Pro Premium Grout in part A and B buckets and two 2-pound (.9 kilogram) part C cartons.
When purchasing grout removal blades and bits, consider the grout joint thickness. Get a blade that is thinner than the grout joint. You do not want to nick the tile while trying to remove grout.
While shopping for grout removal bits, I found details such as blade thickness in tiny print or unavailable on some of the tool packaging.
TOOLS USED FOR RE-GROUTING A SHOWER FLOOR
Dremel Rotary Tool
Dremel Grout Removal Bit
Grout Saw
Bucket Head Vacuum
Ridgid Vacuum Car Cleaning Kit
Diamond Blade for Small Circular Saw
Portable Cordless Work Lights (2)
Epoxy Grout Float Tool
Canvas Drop Cloth
Headlamp
Five Gallon Buckets (3)
Tile Sponge (2)
Leather Gloves
Latex Gloves
Goggles
Dust Mask
Clean Rags
MORE INFORMATION ABOUT EPOXY GROUT
I saw this question about epoxy grout someone had posted on Fine Homebuilding Magazine’s website and thought you might be interested.
Click here for Laticrete Pro epoxy grout installation instructions.
More information about Spectralock is on the manufacturer’s website.
While searching for Dremel accessories to aid with the re-grouted shower floor, I found this unique item worth sharing: a multi-knife for a Dremel oscillating multi-tool for cutting asphalt roof shingles and broadloom carpets.
If you have problems with your bathroom fan, see my article about bathroom fan repair.
To help keep this website FREE, please use this Amazon link for your purchases. As an Amazon Associate, I earn from qualifying purchases.
Click for a FREE copy of my book “Almost Everything You Need To Know To Repair a Bathroom Exhaust Fan In Your Home.”
Get your required “Emergency Disconnect, Service Disconnect” labels and stickers to satisfy the 2023 National Electrical Code requirements in article 230.85(E)(1) and (2) by going to my Redbubble Shop here.
Visit my Link Tree home page for my social media connections and other links.
