Tag: condominium wiring
Add Dimmer Switch and New Ceiling Light Fixture
Dear Mr. Electrician: How do I add a dimmer switch and a new ceiling light fixture? I want to hang a light fixture where there is currently no wiring.
Answer: When considering adding a dimmer switch and a new ceiling light fixture, the structure of the building must be considered.
Table of Contents:
Adding a Dimmer and New Light Fixture
Adding New Wiring
How to Hang a Light Fixture
How To Install A Two-Gang Box
NOTE: Some text links below go to applicable products on Amazon. As an Amazon Associate, I earn from qualifying purchases. Using my links helps to keep this website FREE.
The methods used to achieve this type of installation will vary according to your building structure and the location of the switches and light fixtures. Below are photos of a simple dimmer and ceiling light fixture installation in a two-story condominium.
ADD DIMMER SWITCH AND NEW CEILING LIGHT FIXTURE
It would be best to determine where you will get power from and where you want the wall switch to be. In the example on this page, I was lucky to find power in an existing wall switch where the client wished to have the additional switch located.
Not all wall switches have a hot (LINE) and a neutral. Some have a hot and switch leg that cannot be used to power something else.
I used a long, thin screwdriver inserted alongside the switch box to feel for any obstacles, such as pipes or wood studs. A short piece of fish tape can also be used for probing into a wall.
I removed the existing one-gang plastic switch box and cut a hole for a new two-gang plastic old-work switch box.
Top Of Page
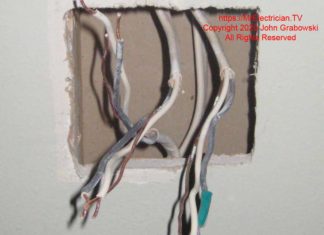
The existing black switch leg wire was temporarily identified with green electrical tape. The other black wires get spliced together. The wood stud on the left side of this wall opening is perfect for attaching the new two-gang plastic old work electrical box for additional support.
NEW WIRING FOR NEW LIGHT
The access hole in the wall and the access hole in the ceiling were made using "The Grabowski Method" (Holding the compass saw at a 45-degree angle) to facilitate the installation of a new wire to feed the new light fixture.
I had to drill inside the wall to avoid damaging the crown molding around the ceiling. A large hole was needed to fit the Milwaukee right angle drill into the wall to drill up into the top support plate.
I did have to cut holes in the ceiling and the wall to facilitate the installation of a new 14/2 Romex cable to the new light fixture location. I cut the holes at a 45-degree angle inward to make it easy to patch later.
Top Of Page
This hole was made using "The Grabowski Method" of cutting holes in drywall. The compass saw is held at a forty-five-degree angle inward when cutting to give a beveled edge to the cutout piece of drywall. This makes it much easier to patch the hole using the same piece of...
