RecepXtenders used to extend the depth of an electrical outlet or switch box
Tag: Receptacle Extenders
Extend Kitchen Electrical Outlets
Dear Mr. Electrician: How do I extend the kitchen electrical outlets from the wall a little so I can add ceramic tile?
Answer: Using electrical box outlet extenders or receptacle extenders is a simple and approved method for extending kitchen electrical outlets when the wall depth changes.
NOTE: Some text links below go to applicable products on eBay and Amazon. As an Amazon Associate, I earn from qualifying purchases. Using my links helps to keep this website FREE.
To use outlet box extenders, the existing electrical outlet box must be in good condition, and the screw holes must be able to hold 6/32 machine screws tightly. Otherwise, the existing electrical box should be replaced.
Electrical receptacles or box extenders are required when adding depth to a wall as per article 314.20 in the National Electrical Code (NFPA 70). Electrical boxes must be flush with the finished surface to prevent sparks from getting onto combustible wall materials and support the wiring device.
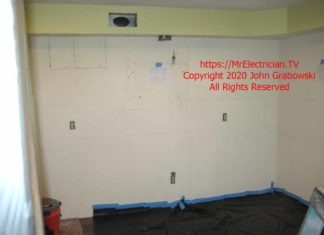
Below are photos from a kitchen remodel I worked on. Some of the existing electrical boxes remained in place, while others had to be relocated. Adjustable-depth electrical boxes and ReceptXtenders were both used on this job.
HOW TO EXTEND KITCHEN ELECTRICAL OUTLETS
Often, I find that the original plastic electrical box needs replacing, in which case I use adjustable depth boxes to adjust the box to the perfect depth when the wall is finished.
Below is the process I went through to accommodate the new kitchen cabinet arrangement and tile backsplash with new and existing electrical outlets.
Most of the existing outlets did not need to be relocated; the electrical boxes just needed extending. A new wall oven was going to be installed, so I moved the outlet from that location.
I had to change the ceiling light switch that someone had moved in a previous renovation. There was already a switch and light above the sink so I could use some of the existing wiring for the new low-voltage sink lights.
I first drew a couple of level lines at the backsplash height and cut out the drywall where I needed to work. The job called for installing new undercabinet lighting and extending and relocating outlets. You can see part of the undercabinet lighting installation in my post here.
I like to use adjustable-depth electrical boxes for kitchen and bathroom outlets and switches. That way, I am prepared for any thickness of the finished wall or backsplash.
After I install the adjustable depth boxes during the rough-in wiring phase of construction, I adjust them to stick out further than needed. That ensures that whoever installs the wall coverings will entirely cut around the electrical box.
If I kept the box recessed, I would have to cut the hole bigger to accommodate the wiring device because the wall finishers have a tendency to overlap the electrical box. I have no problem cutting drywall, but tile and stone are more challenging.
CLICK HERE to See Adjustable Electrical Boxes on Amazon
As depicted above, I prefer to leave the boxes protruding from the wall a little so...
