Dear Mr. Electrician: How do I install recessed lighting in a condominium kitchen?
Answer: Installing recessed lighting in a condominium kitchen will vary depending on the structure of the building or house. Recessed lights are sometimes called pot lights or can lights.
NOTE: Some text links below go to applicable products on Amazon. As an Amazon Associate, I earn from qualifying purchases. Using my links helps to keep this website FREE.
The light projected from recessed fixtures will differ from a fluorescent light fixture. Recessed lights point the light down, so the ceiling tends to be dark. However, having multiple lights instead of just one will illuminate the lower areas that were dark before. In addition, the color of the light will likely be different depending on your choice of light bulbs and their color temperature.
Table of Contents:
You should do some homework before choosing what type of recessed light to install. My recessed light installation example below is in a condominium kitchen on the first floor with a bedroom above.
CHOOSING A RECESSED LIGHT FIXTURE
Generally speaking, a recessed light has three components: a housing or frame, a trim, and a light bulb. Some types also have a transformer for low-voltage bulbs or a driver for LED light bulbs. There once were fluorescent recessed lights with a ballast inside them, but I think LEDs have replaced them.
There are several diameters of housings and, in addition, many types and colors of trims. In addition, there is a large selection of light bulb types available. Each will have a different kind of light output. Not all light bulbs will fit in every recessed light. Residential recessed lights are available in 3″, 4″, 5″, and 6″ diameters.
Here is a link to six-inch Halo recessed lighting traditional trims.
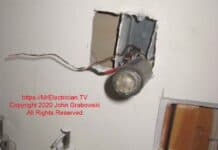
There are two types of recessed lighting housings. One is for new construction, and the other is for remodeling into existing finished ceilings. An example of a remodeling-type installation is below.
Smaller recessed lights tend to have less beam spread (Meaning the light is narrow) and are limited in light bulb choices. Consequently, if you want a lot of illumination, you will need more recessed lights. When researching recessed lights, look closely at the light bulbs the manufacturer has approved for installation. Details such as color temperature, beam angle, voltage, and lumens should be considered during decision-making.
A 2700K light bulb will have the same warm color as the incandescent light bulbs your parents grew up with. 3000K is a little whiter but still warm. 3500K will be a whiter warm color. 4000K is the color of office and store fluorescent lights. 5000k is getting close to full spectrum daylight and will appear slightly blue. 6500K is suitable for growing plants and is healthy for humans.
My most common residential recessed light installation is the Halo H7 6″ diameter can with a BR40 light bulb. The BR40 bulb has a wide beam spread, and the 6″ diameter housing has the most choices of light bulbs and trims that can be used with it.
My clients mainly chose the white Coilex trim as it blended with their white ceiling. Other recessed light manufacturers also have 6″ housings with many trims.
New energy-saving LED products on the market incorporate a non-replaceable lighting device and trim. They fit in most housings and provide a lot of light. There are limited choices of trim types and trim colors with LED trims.
INSTALLING RECESSED LIGHTING IN A CONDOMINIUM KITCHEN
The most challenging aspect of wiring retrofitted recessed kitchen lights is measuring and laying out the location for each light. With a finished ceiling, there is no simple way of knowing what obstacles might be in the way of your light installation. Therefore you must probe the ceiling ahead of time to see if there are any utilities or building structures where a recessed light was planned.
Something to be mindful of is the fire rating of the ceiling if there is another condominium above yours. Remodeling-type recessed lights are usually not fire-rated.
An alternative to recessed lights would be installing surface-mounted LED disks on the ceiling, which resemble recessed lights but are mounted directly onto a standard round or octagonal electrical box.
There are also available spring-loaded wafer lights that attach directly to the drywall ceiling. They have their own attached junction box. These are good for when there is low ceiling clearance due to an air duct or a pipe. I do not know if these are acceptable in fire-rated ceilings.
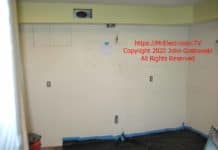
Below are some photos of a recessed lighting installation in a condominium kitchen.
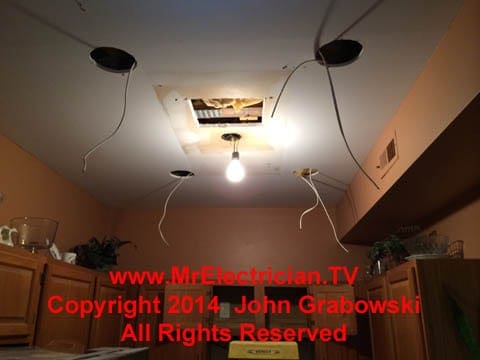
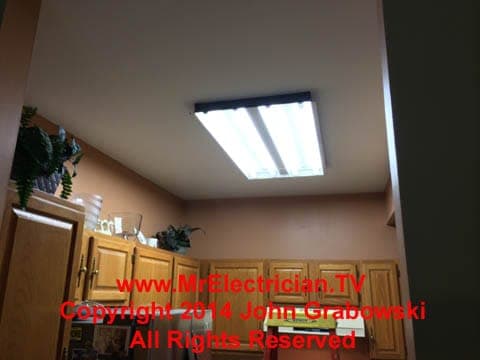
A hole was cut in the middle of the ceiling to facilitate the installation of the wires. The center-positioned round electrical box was the original feed for the old fluorescent ceiling light fixture. A temporary pigtail light socket was connected for work lighting. Although this condo was built with wood truss construction, there were still obstacles to prevent the wires from being easily fished across the ceiling.
STEPS TO INSTALL RECESSED LIGHTING
First, apply for an electrical permit at your local building department. In the job below, I submitted a specification cut sheet (Usually available from the manufacturer’s website) for the type of light I was installing, along with a hand-drawn diagram of the light placement on the ceiling in relation to the cabinets and appliances.
I also included a short “Scope of Work” that I typed up briefly detailing the work and wiring methods I will use. It is best to give the building department as much information as possible ahead of time in an abbreviated manner so they completely understand what you intend to do. You will find out in advance if there is a problem with your wiring methods. The alternative is that the inspector will look at your finished work and fail the inspection if something is wrong.
My first action for wiring kitchen recessed lights is to make a tiny pencil mark on the ceiling where the customer said they would like the recessed lights to be installed by taking some measurements from each wall. I mark all of the lights. I then look for signs of ceiling joists by searching for nail pops or spackled holes. A bright flashlight held close to the ceiling is helpful for this.
Next, I make a small hole in the center of the recessed light location and poke a long thin screwdriver or a short piece of fish tape through the ceiling. I rotate the screwdriver or fish tape in different directions to probe for obstacles.
If it appears clear of obstacles with the screwdriver, I use a homemade tool that I fabricated from a coat hanger. It is an L-shaped coat hanger wire with the lower part the size of the radius of the recessed light to be installed. I push the L-shaped wire up into the hole and spin it around while moving it up and down. I also pull it down close to the ceiling to check for resilient channel that is used to reduce sound transmission.
If one hole is clear, I move on to the next recessed light location and do the same thing. I repeat these steps for all of the recessed light locations. If I find one or more that has an obstruction, such as a ceiling joist, a pipe, or an air duct, I have to remeasure and reconfigure all of the recessed light locations and then probe again.
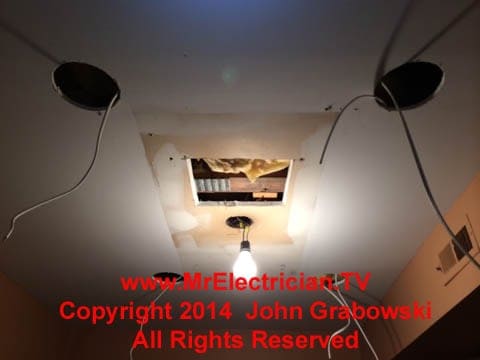
In the photo above, a rubber pigtail light socket was connected to the existing light feed for temporary lighting. The existing ceiling electrical box will be removed, and the wire will be brought into one of the new recessed lights.
Once I have all the recessed light locations marked and probed and am confident there are no obstacles, I cut the holes for the old work recessed housings. The manufacturer furnishes a template for cutting with each light. I use my awl to center the template on my probe hole and draw a pencil line around the template. I then cut the hole by hand using a keyhole or compass saw.
There are hole saws available to cut these size holes. However, I prefer to do it by hand just in case there is something that I missed with my probing, such as a telephone wire. I can usually feel through the saw if I hit anything.
I use the bottom of a plastic juice bottle to reduce dust landing on the floor. I cut a slot for the saw to go through (See photos below). The juice bottle bottom catches a good portion of the dust while the remains float down to a drop cloth on the floor. Sometimes I put a box on top of the ladder to catch dust, but I must be careful not to knock it over.
I once saw a picture of another electrician who would take a box and use some cord to tie it to his waist and hang it from his neck to catch the dust as he cut holes. Catching the dust keeps it from spreading around and makes clean-up a little easier.
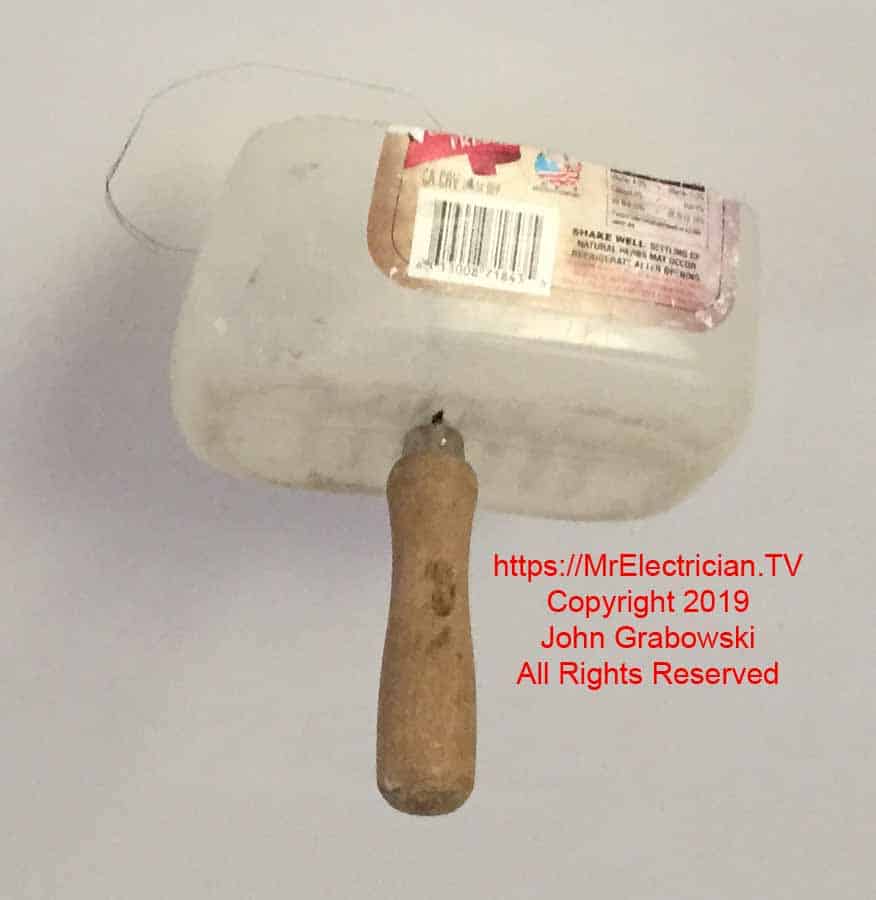
My homemade dust catcher has been very helpful during the end clean-up process, catching much of the drywall dust before it lands on the floor.
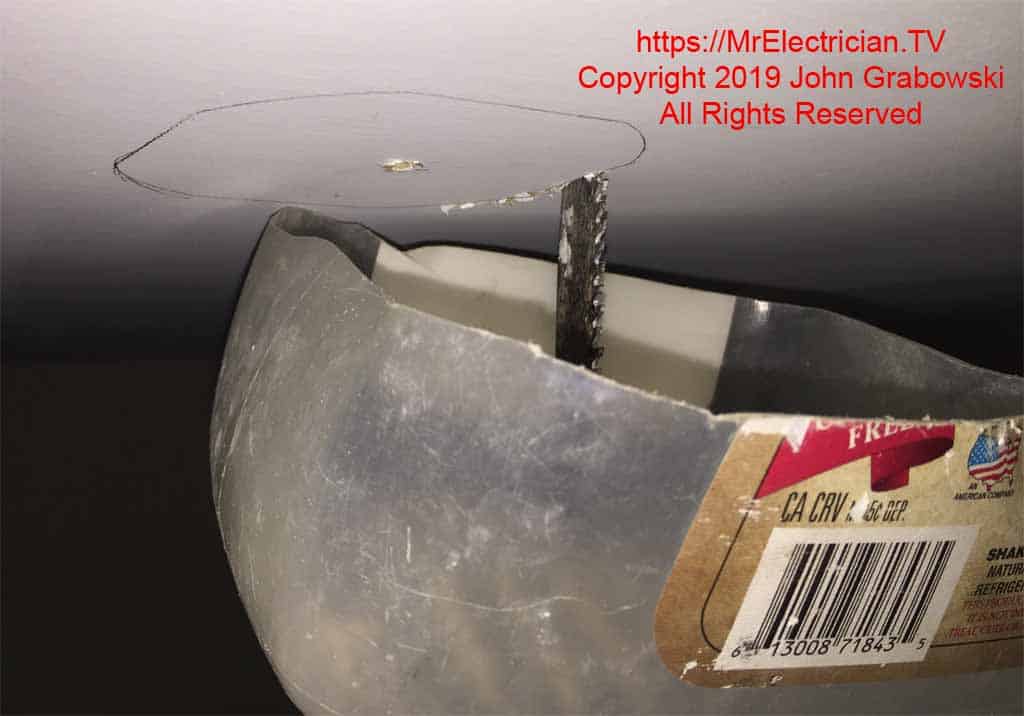
In the above photo, the small hole in the center of the cut ceiling opening is where I inserted my long thin screwdriver and my L-shaped coat hanger wire to probe for obstacles before I cut the hole.
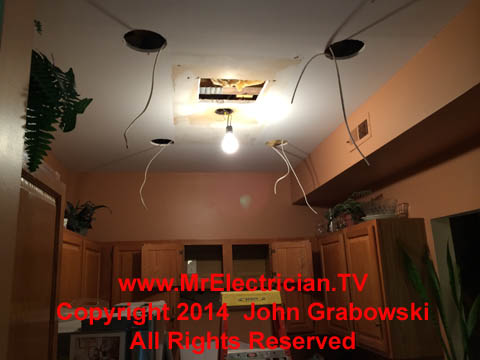
In this particular ceiling, water and gas pipes were located where the recessed lights were initially planned to be installed.
By probing with a long thin screwdriver and a short piece of fish tape, it was possible to locate the obstacles through a small hole.
After all the holes for the recessed lights were cut, I figured out where to drill inside the ceiling to install the wires. Some homes have truss construction, which makes it easy to fish wires through without drilling through ceiling joists.
Solid wood joists will need to be drilled through. A hole is needed in the ceiling on each side of the joist so that a drill can fit in the ceiling and the wire can be pushed through.
I cut the ceiling holes at a 45-degree angle with the blade pointed inward toward the center of the hole. This makes it much easier to patch later when done.
I use an angle drill with a 9/16″ self-pulling auger drill bit for drilling through a ceiling joist as I don’t have to insert the entire drill through the hole, and it has a lot of torque.
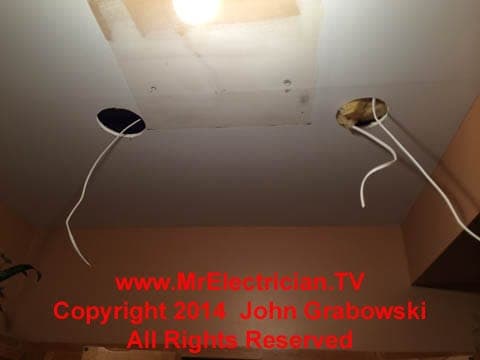
With wood truss construction, there is much room to fish wires for recessed lights in the ceiling without having to drill ceiling joists. Halo H7, 6″ recessed light remodel housings were used here with white coilex trims.
Once the holes are drilled, you can install the new cables from one light fixture to the next light fixture. Use the existing cable from the old light fixture to feed power to the nearest new recessed light.
If there isn’t an existing cable in the ceiling from an old light fixture, you will need to determine where you will be getting power from and how you will operate the lights.
If there are existing wall switches, you may get power from one of them by removing the switch box in the wall and then installing a larger switch box. I have another post that shows how to do this here.
If there aren’t any wall switches where you would like the new switch, you will need to find a power source, such as an existing electrical outlet. Then you must install a cable from your power source to your desired switch location. This could entail cutting additional holes in the wall to get the cables where needed.
In a home with a basement or attic, it may be easier to install new cables as it is possible to drill up or down into a wall if you have the correct location identified.
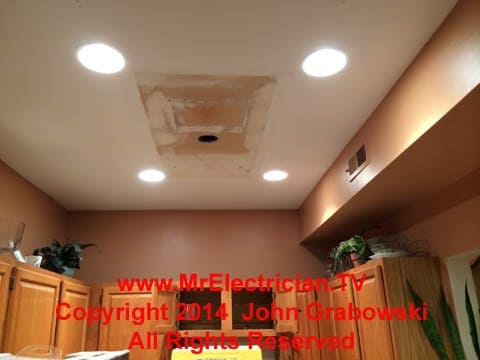
The square hole in the center of the ceiling was cut with the compass saw held at a 45-degree angle. This makes patching the hole with the same removed piece of drywall and some joint compound much easier. All edges are buttered with joint compound and smoothed in place without taping.
Connect the recessed lights to the cables hanging from the ceiling. The junction boxes attached to remodel-type recessed light housings tend to be small, so I leave only about six inches of wire inside each cable. You can install the recessed lights once the wires are spliced tightly and covered.
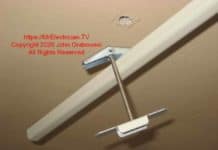
Installation of remodel-type recessed lights varies between manufacturers and sometimes between sizes in one brand. Usually, some clips or springs go against the finished ceiling to hold the can tightly in place. Check the manufacturer’s instructions.
I have found that inexpensive off-brands are more difficult to install than the well-known brands at my local electrical supply company. The off-brands are furnished by customers who bought them before I was hired.
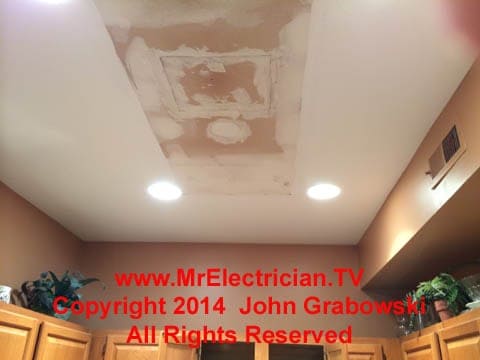
The round hole from the former existing ceiling electrical box was patched using a filler piece of drywall that was cut from one of the light fixture cut-outs. A piece of wood was laid across the opening to support the filler piece. A drywall rasp is good for shaping drywall.
Once the remodel housings are installed, the finish trim can be attached. This will vary by trim and manufacturer, but it is usually just a couple of springs that hold it in place. After that, the light bulbs can be installed. Using the correct light bulb for your housing and trim is crucial.
A label inside the recessed light housing will show what light bulbs can be used. In addition, certain trims may be limited to the size and type of light bulb that can be used. If the wrong light bulbs are used, you may not get the illumination you expected, or you can overheat the recessed housing.
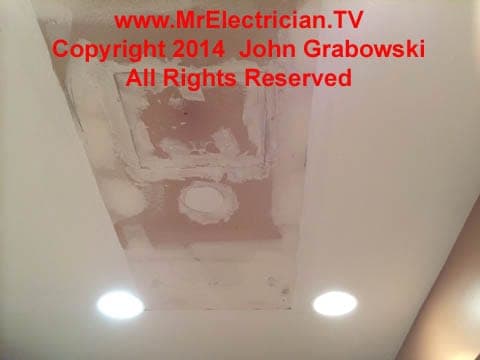
After 24 hours, the patch above can have another coat of joint compound applied. After that dries and is sanded, the ceiling can be painted. On this particular installation, it was possible to eliminate the existing round ceiling electrical box because it had only one cable, which was re-routed to one of the recessed lights.
Once the electrical work is finished, the holes in the drywall must be patched. I always do a rough patch using the old drywall pieces I cut out. The ceiling will still need another coat of joint compound and sanding and painting the next day, but I only specify a rough patch in my proposals. Whoever paints the ceiling can apply a smooth finish coat of joint compound.
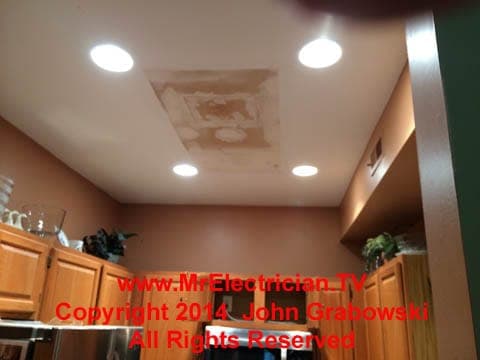
The bulbs used in the recessed lights are 70-watt BR40 halogen light bulbs which are approximately equal in light output to a 100-watt BR40 incandescent light bulb.
UPDATE: I no longer use BR40 halogen light bulbs due to lack of availability. I now use BR40 LED light bulbs for recessed lighting installations.
Although I had done work in the condominium above before and knew that the ceiling contained trusses for support, it still turned out to be a challenge as I found a pair of water pipes installed directly above where the customer initially wanted a recessed light. As a result, I had to remeasure for all the lights to be evenly spaced. There was also an air duct near the center of the ceiling, so I had to cut a hole in the middle to get the cable around it.
There are alternatives to recessed lighting, such as LED Disks that mount on a standard octagonal electrical box or have an attached junction box for hard wiring. They are helpful, especially when space above the ceiling is limited. However, unlike recessed lights, where you can change light bulbs as new products come out or your lighting needs change, LED Disks are permanent until they get replaced.
My article about finding wall studs and ceiling joists may be helpful.
Click to see how I installed an electrical outlet for the microwave oven over the stove in the above kitchen.
I have over 30 Categories of electrical wiring articles.
Click here for a FREE copy of my book “Almost Everything You Need To Know To Repair a Bathroom Exhaust Fan In Your Home.”
Get your required “Emergency Disconnect, Service Disconnect” labels and stickers to satisfy the 2023 National Electrical Code requirements in article 230.85(E)(1) and (2) by going to my Redbubble Shop here.
Visit my Link Tree for social media links and merchandise.
