Dear Mr. Electrician: How do I replace a sub-panel?
Answer: To replace a sub-panel requires a certain amount of knowledge, experience, skill, and tools. There aren’t many standard guidelines that apply to replacing a sub-panel other than safety. Each sub-panel replacement will be unique.
NOTE: Some links below go to applicable products on Amazon. As an Amazon Associate, I earn from qualifying purchases. Using my links helps to keep this website FREE.
REPLACE A SUB-PANEL
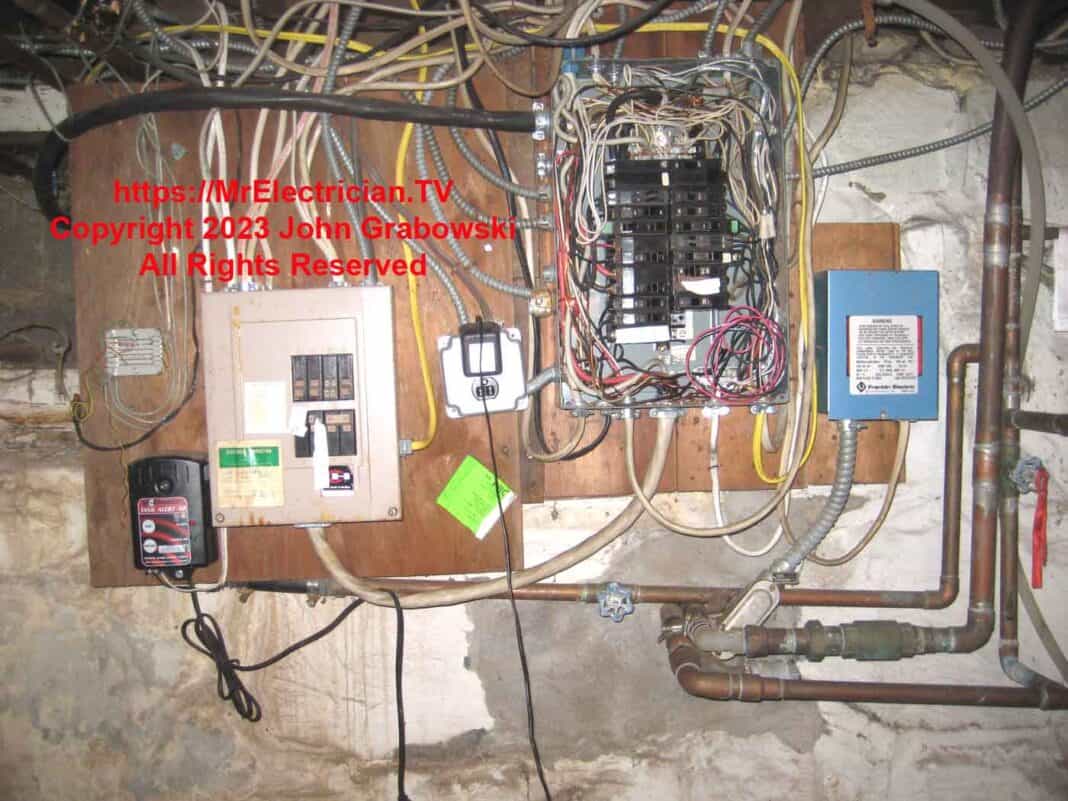
Below are some photos of a sub-panel replacement in a special house. The gray sub-panel depicted was the main electrical panel until another house was moved next to this one and was attached. As a result, a new service was put on the house that had been moved, and a new four-conductor cable was installed to feed the old main panel, turning it into a sub-panel.
After identifying as many circuits as possible and labeling them, I shut off the power. I worked with one wire at a time removing each one from the existing sub-panel.
If the situation allows it and the new sub-panel can be installed without removing the old sub-panel, I will move the wires one at a time from the old sub-panel to the new one.
This is tedious work and it is important to get everything right, and all connections tightened to the manufacturer’s recommended torque values. A torque wrench and torque screwdriver are needed for this.
The photo at the top shows the blue well pump relay box on the right. The well pump circuit breaker shut-off was located in another basement in a generator sub-panel and inaccessible from where the relay is. In addition, this circuit was spliced inside the sub-panel.
When I went to replace the sub-panel, I removed the well pump circuit from the old sub-panel and brought it into a new switch box installed on top of the blue well pump relay. Now, there is a nearby disconnect switch for servicing the pump relay. I put a hoop over the switch to prevent accidental shut-offs.
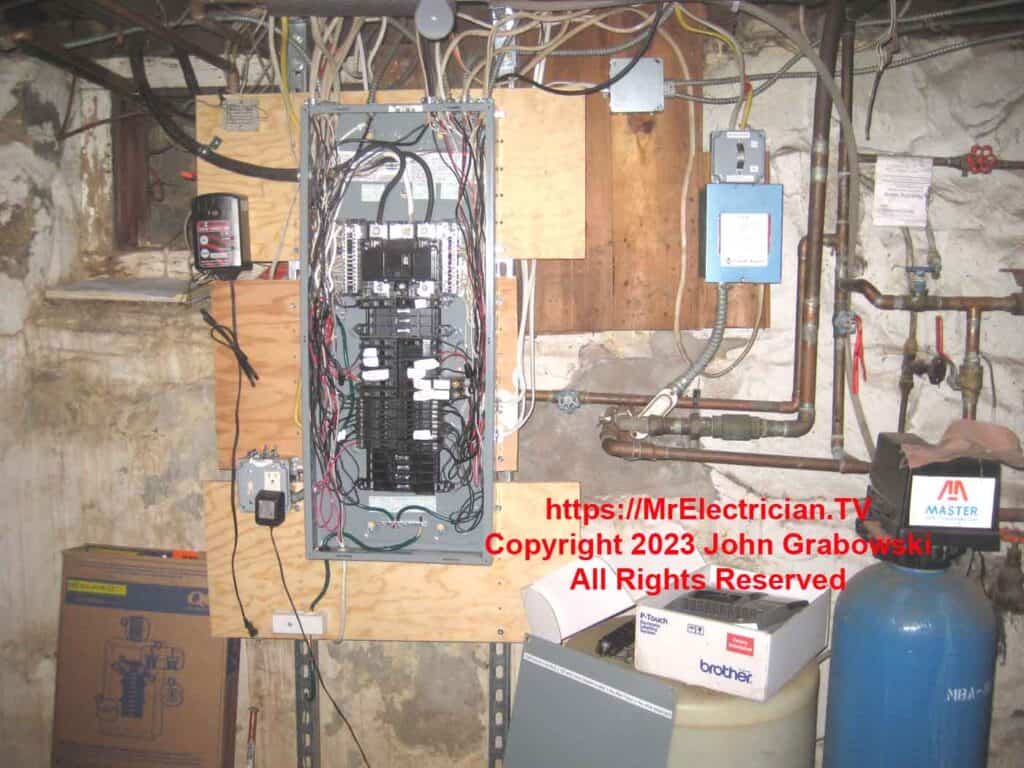
The new sub-panel is a Square D single phase 120/240 volt, 200 amp, 40/60 (40 spaces, 60 circuits) main breaker panel. The wire feeding the sub-panel is number one aluminum on a one hundred amp circuit breaker in the main electrical panel in the other basement.
Because the basement foundation is stone, I used vertical struts attached to the ceiling joists and the concrete floor to support the new electrical sub-panel. I used quarter-inch bolts to attach the plywood with spring nuts to the strut.
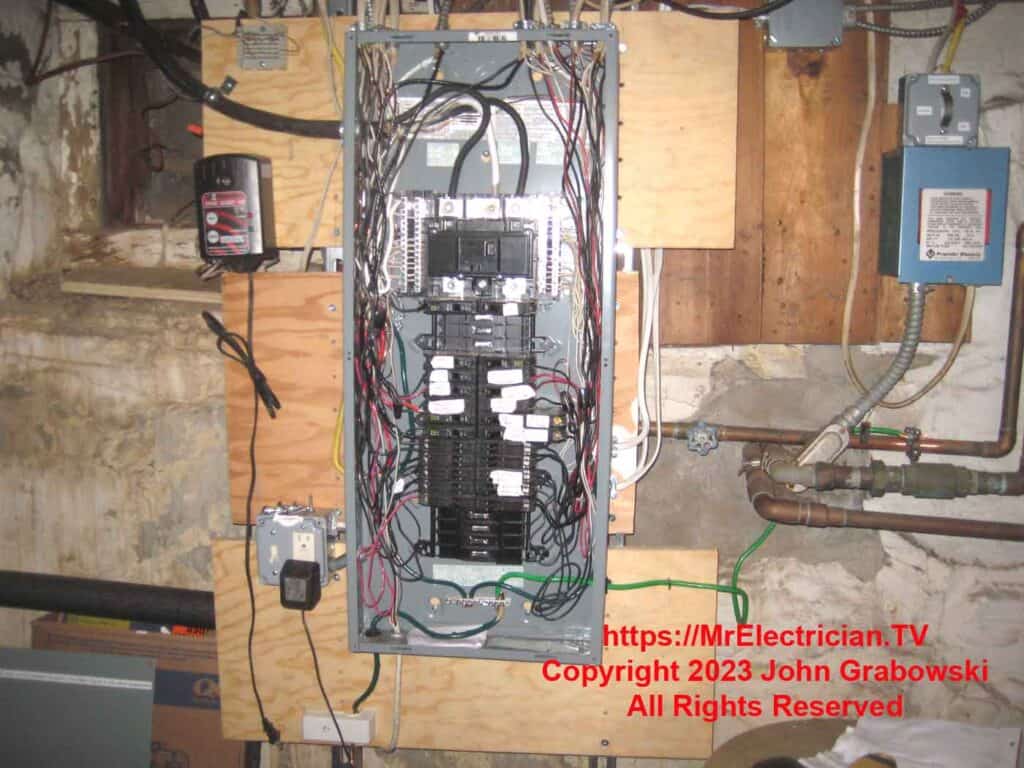
In the photo above, you can see the water pipe ground/bond connection. The pipe from the well was plastic, so there was no ground from the earth. However, all interior metal piping must be grounded by bonding it to the grounding terminal. This is to prevent the pipe from becoming energized from faulty wiring and for lightning protection.
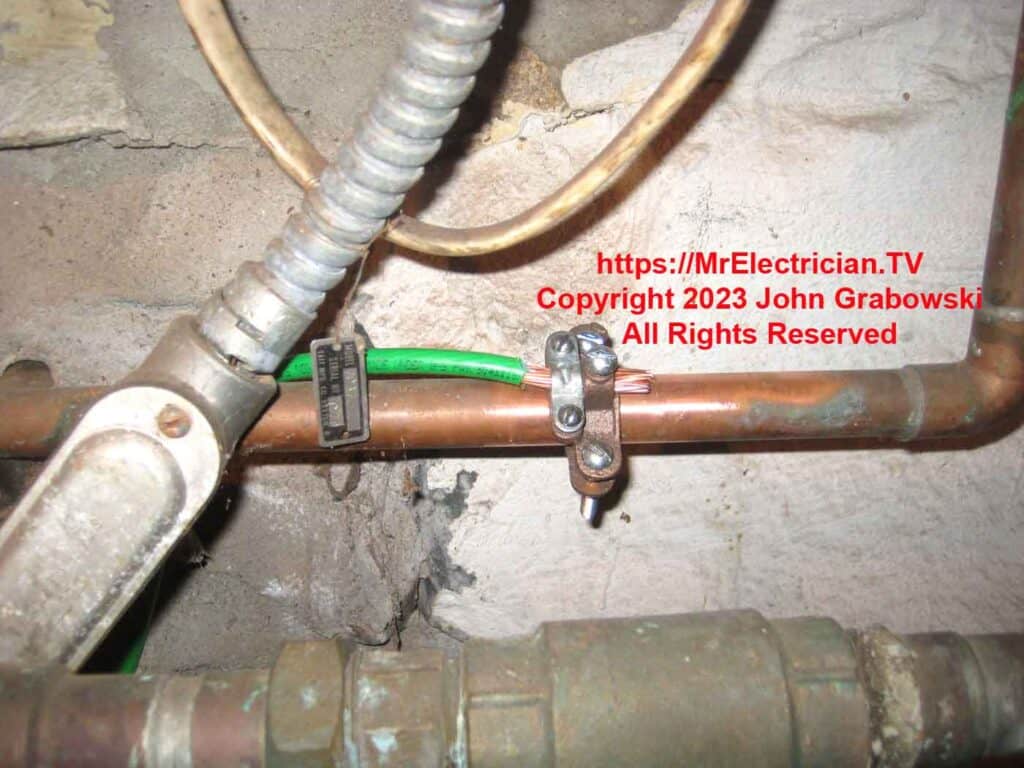
The water pipe ground clamp in the photo above is made for grounding electrode conductors with a metal armored jacket. The metal jacket is locked on the small clamp, and the wire connects directly to the ground clamp. When you go to replace a sub-panel, there is a good possibility that a ground clamp will be corroded or loose.
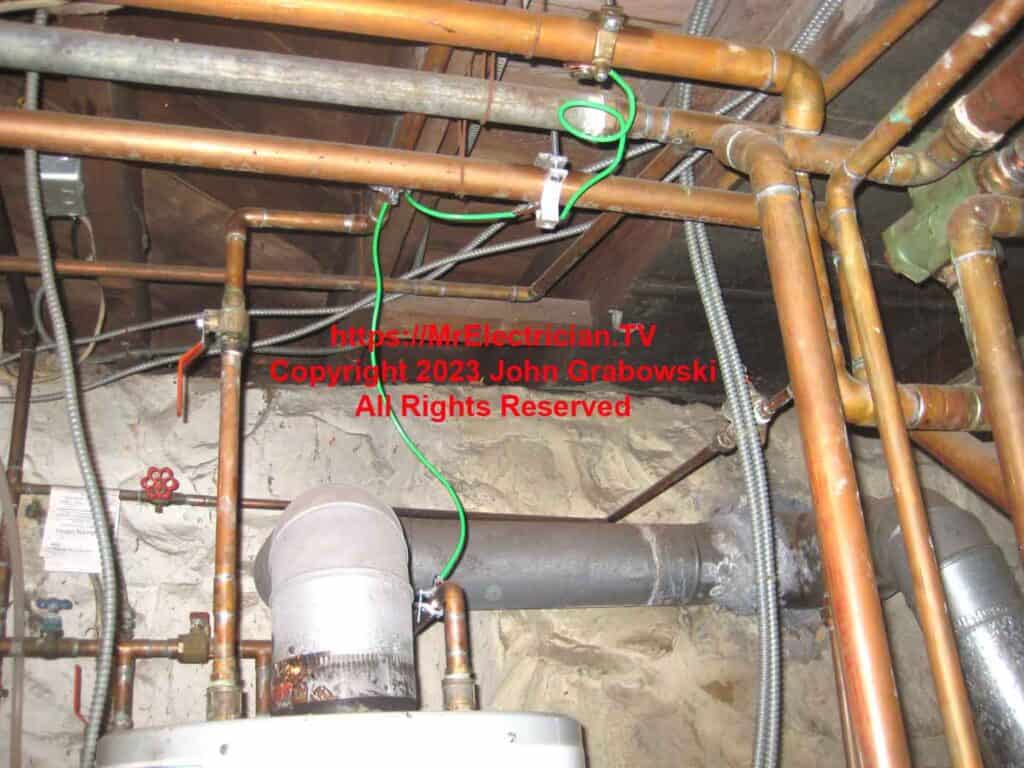
There were a lot of copper pipes in the basement due to the hot water home heating system. When you replace a sub-panel, they must be bonded together.
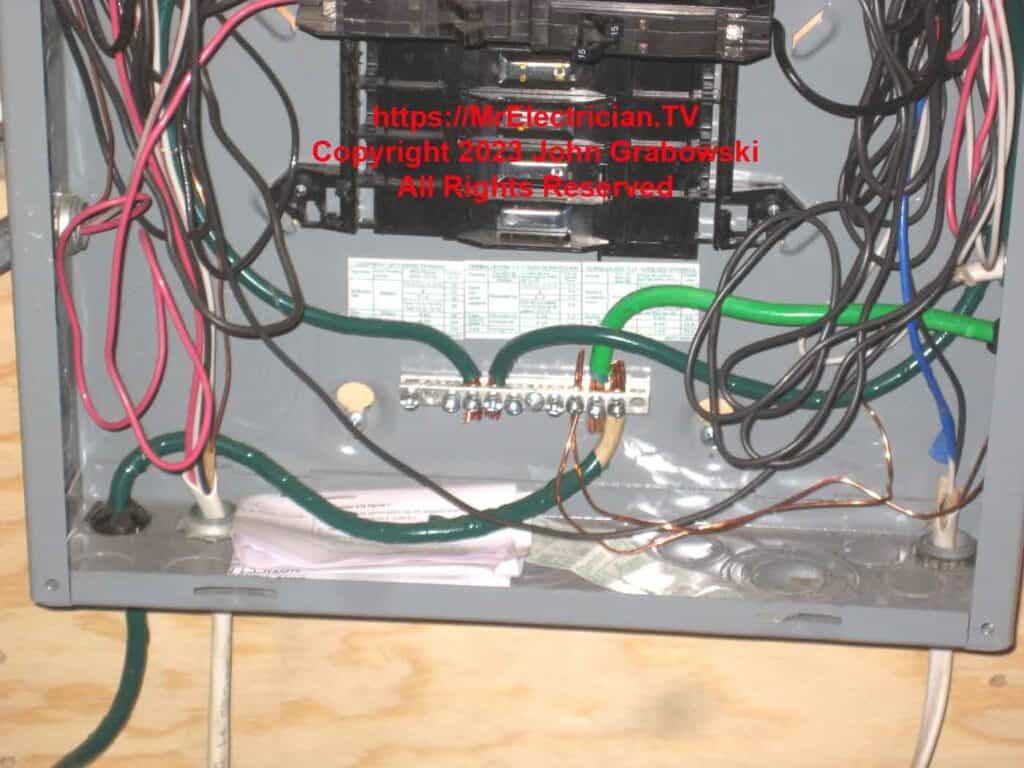
I installed a ground rod through the basement floor for the new sub-panel using an SDS Max rotary hammer with a ground rod driver attachment.
I added an intersystem bonding termination for other utilities to bond to.

Click here to see some generator sub-panel installations.
To help keep this website FREE, please use this Amazon link for your purchases. As an Amazon Associate, I earn from qualifying purchases.
Click for a FREE copy of my book “Almost Everything You Need To Know To Repair a Bathroom Exhaust Fan In Your Home.”
Get your required “Emergency Disconnect, Service Disconnect” labels and stickers to satisfy the 2023 National Electrical Code requirements in article 230.85(E)(1) and (2) by going to my Redbubble Shop here.
Visit my Link Tree home page for my social media connections and other links.
