Dear Mr. Electrician: How do I go about repairing a ceiling electrical box? I removed the hanging ceiling light fixture in my kitchen and found that the ceiling light electrical box appears to be very loose. The box seems to be mounted on one side. Any suggestions?
Answer: There are a few tricks to repairing a ceiling electrical box. If it is a metal box, you may be able to strengthen its support by drilling a couple of screws through the side of the box and into the joist.
NOTE: Some text links below go to applicable products on Amazon. As an Amazon Associate, I earn from qualifying purchases. Using my links helps to keep this website FREE.
The electrical box may have been installed initially using nails into the side of the joist. They could have pulled out a little. I have encountered electrical boxes fastened to joists using only cable staples. Staples tend to pull out easier than nails.
If it is a metal or plastic electrical box attached to a metal bracket in-between joists, you may be able to tighten the center screw to tighten the box.
If it is still loose after that, the bracket may have come loose from the ceiling joists. In that case, you should follow my instructions below for installing a retrofit ceiling fan brace and box.
If the ceiling box is plastic, I would remove it and install a metal box. Non-metallic boxes can be made of different materials, such as PVC, fiberglass, or composite material. Fiberglass boxes can be broken apart, as can those made of composite material. PVC boxes do not break apart that easily unless they are old and brittle.
For a PVC side-mounted nail-on box, I start with a small pry bar or a large screwdriver and try to get behind the box to force it away from the wood joist. See below about labeling wires first before doing this.
At some point after prying, I take my Knipex 10″ High Leverage Diagonal Pliers and nip away pieces of the box until I can get it out of the ceiling. Take good care of the wires when doing this.
REPAIRING A CEILING ELECTRICAL BOX THAT IS LOOSE
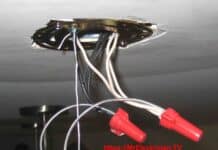
Turn the power off to this circuit. Remove the fixture mounting bracket by removing the 8-32 screws. Without disconnecting the wires that are inside the metal ceiling light electrical box, pull them down and away from the sides of the box.
Drill 2 or 3 holes using a 1/4″ or 3/16″ drill bit through the side of the box close to the ceiling joist. DO NOT drill into the joist. Screw some #10 or #12 long sheet metal screws with fender washers through the holes into the joist.
I’m not sure what screw length you will need, but you want to have at least 1″ of the screw in the wood. Probably 1 1/2″ or 2″ screws would work. I recommend using hex head or Phillips pan head screws and a drill or impact driver to drive the screws in.
If the existing ceiling box is plastic and appears broken, replacement is your only option. Use an old work ceiling fan box and brace for replacement.
CEILING FAN BOX INSTALLATION
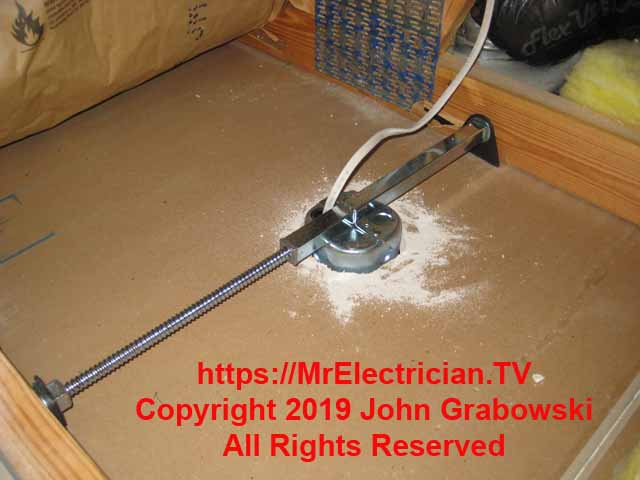
The alternative to the above repair is to remove the box entirely and install a ceiling fan brace and box, providing plenty of support. Since the box is loose already, you can pry it away from the joist using a small pry bar or a large screwdriver.
Before removing the existing ceiling light electrical box, you must tag the wires so they can be reconnected properly. You can use colored electrical tape or labels with numbers for this. You must undo any electrical wire splices and then loosen the clamps or remove the locknuts on connectors and remove them from the box.
Next, twist the box around until you can pull it through the existing hole without doing too much damage to the ceiling. Buy a fan brace and box kit for retrofit and follow the instructions for installation.
A side mount fan box with a bracket is available in addition to a fan brace that expands between joists. If the joist is at the edge of the ceiling hole, I suggest the side mount bracket. Use the expanding fan brace if the hole is further away from the joist.
CLICK HERE to see Ceiling Fan Braces and Boxes on Ebay
The retrofit expanding fan brace fits up inside the existing hole in the ceiling, and you tighten it to lock between two joists. Then, the fan-rated electrical box gets mounted to the brace with the included hardware. Bring your wires into the new fan box before attaching it to the fan brace in the ceiling.
You would also use the above technique to install a ceiling fan, which will require a fan brace and box. See my blog post about installing a ceiling fan using existing wiring with fan-rated electrical boxes.
My blog post about replacing an old-style pancake box may be helpful to you.
My blog post about wiring diagrams for ceiling lights and switches will be useful to you.
To help keep this website FREE, please use this Amazon link for your purchases. As an Amazon Associate, I earn from qualifying purchases.
Click to join my mailing list and receive a FREE copy of my book “Almost Everything You Need To Know To Repair a Bathroom Exhaust Fan In Your Home.”
Get your required “Emergency Disconnect, Service Disconnect” labels and stickers to satisfy the 2023 National Electrical Code requirements in article 230.85(E)(1) and (2) by going to my Redbubble Shop here.
Visit my Link Tree home page for my social media connections and other links.
