Dear Mr. Electrician: Tell me how to install a Tesla wall charger.
Answer: Telling you how to install a Tesla wall charger is not so simple. Several National Electrical Code requirements must be met depending on the charger’s location and the materials being used for the installation.
NOTE: Some links below go to applicable products on Amazon and Redbubble. As an Amazon Associate, I earn from qualifying purchases. Using my links helps to keep this website FREE.
Article 625 in the National Electrical Code covers the installation of electric vehicle chargers. In addition, other parts of the electrical code and other building codes will apply depending on the materials used and where you are planning to install a Tesla wall charger.
A TESLA WALL CHARGER INSTALLATION
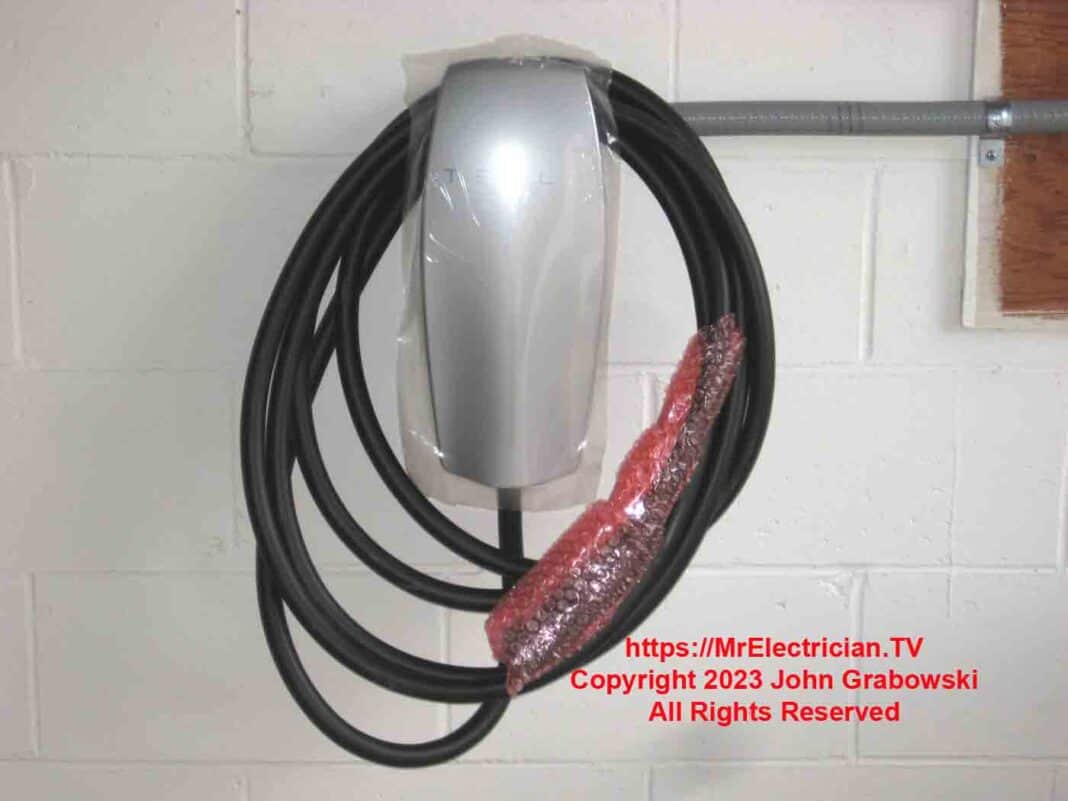
I received a call from a client with whom I have done much work. He said he got a Tesla electric vehicle and needed me to install a charger at home.
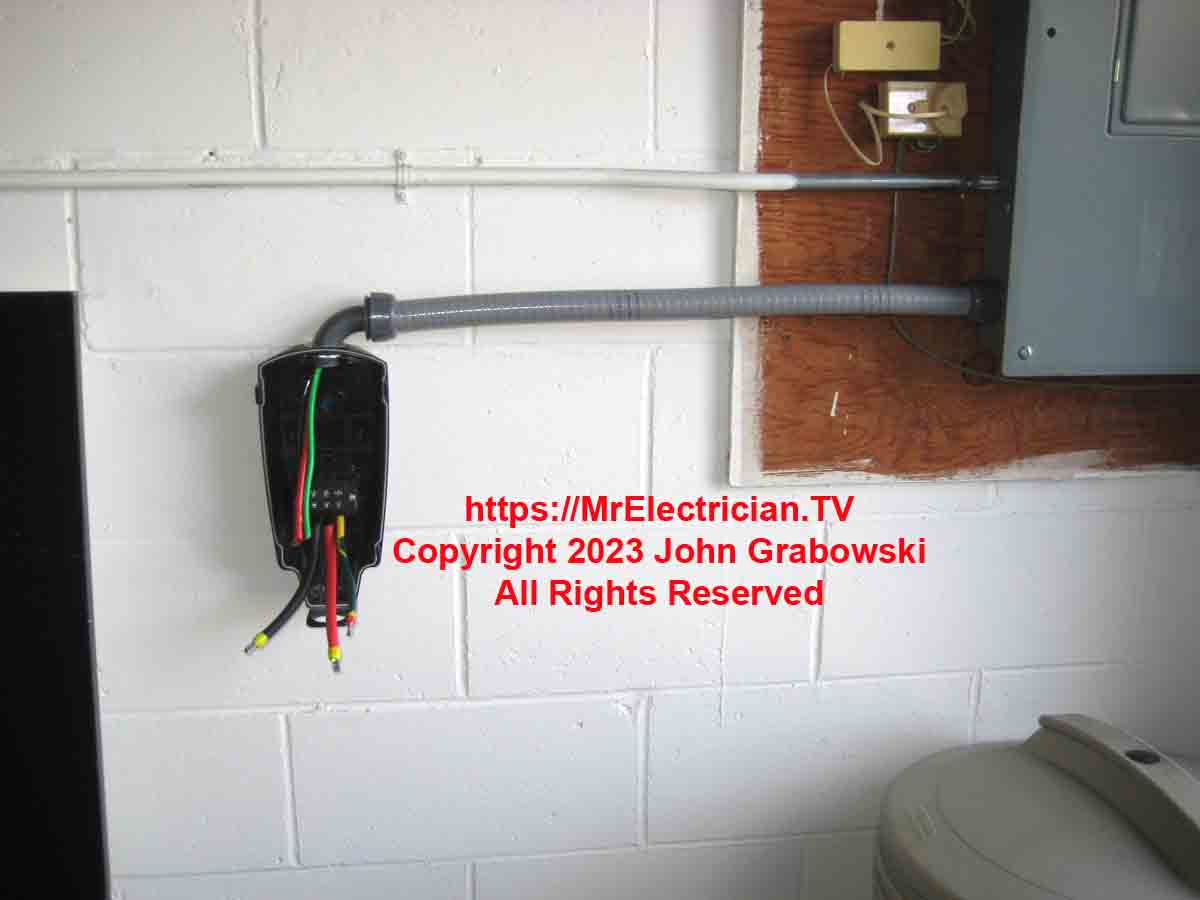
I showed up at his house and found that he had started to install a Tesla Wall Connector charger but needed me to finish it. I had applied for the electrical permit the week before and had to wait for it to be approved.
The client had gotten antsy and was tired of slowly charging his new electric vehicle with an extension cord plugged into a regular 120-volt household receptacle outlet.
He used blue Tapcon concrete screws to attach the charger to the concrete block wall in his garage. Holes for the screws were made using an electric hammer drill and masonry drill bit.
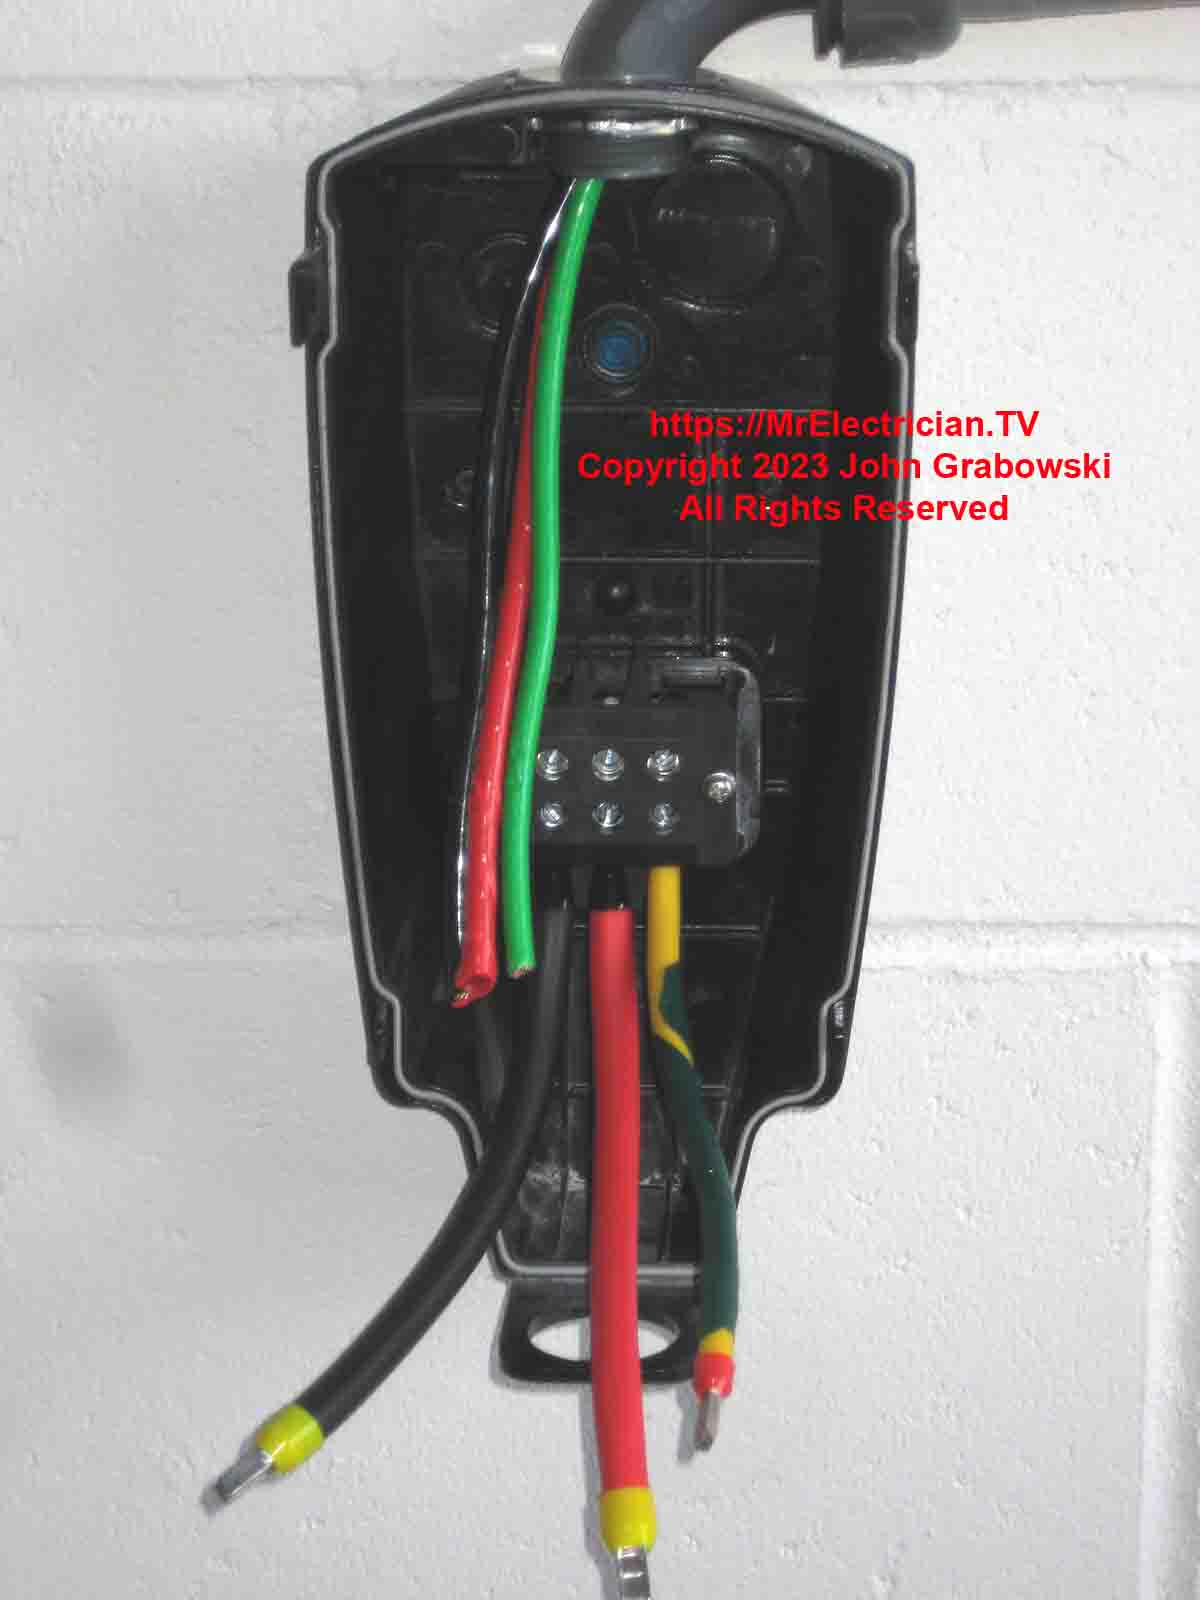
The installation was straightforward, with the Tesla Charger close to the main electrical panel. The client had already pulled the wire into the LFNC conduit. All I had to do was terminate and label everything.
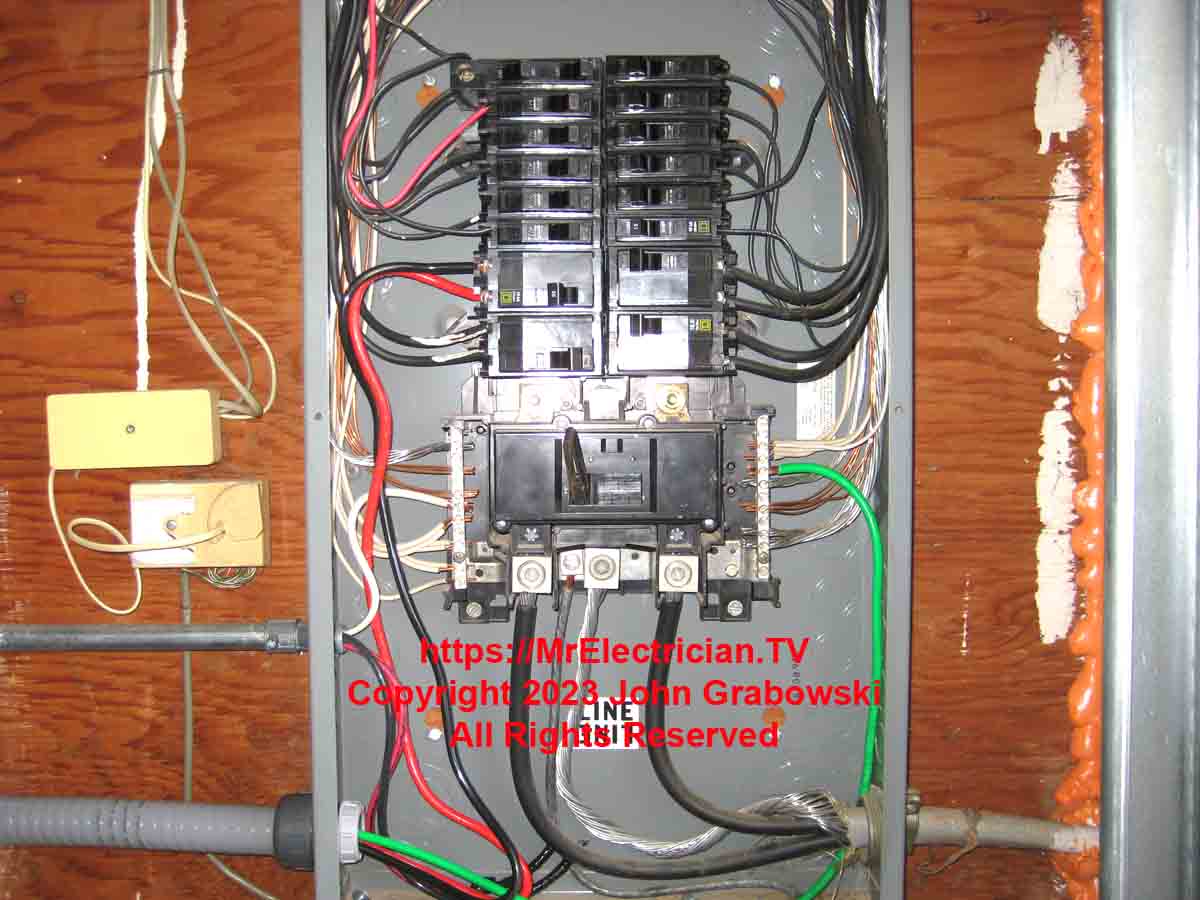
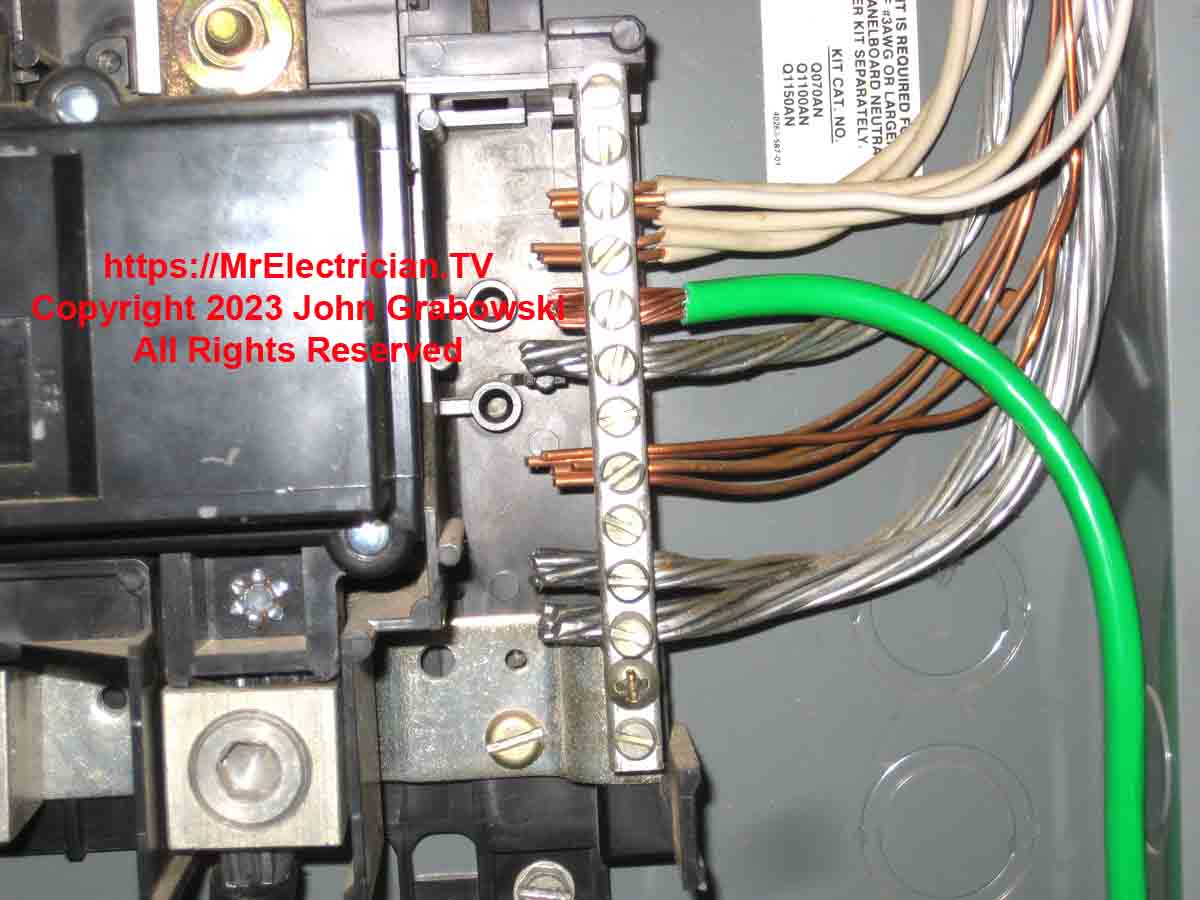
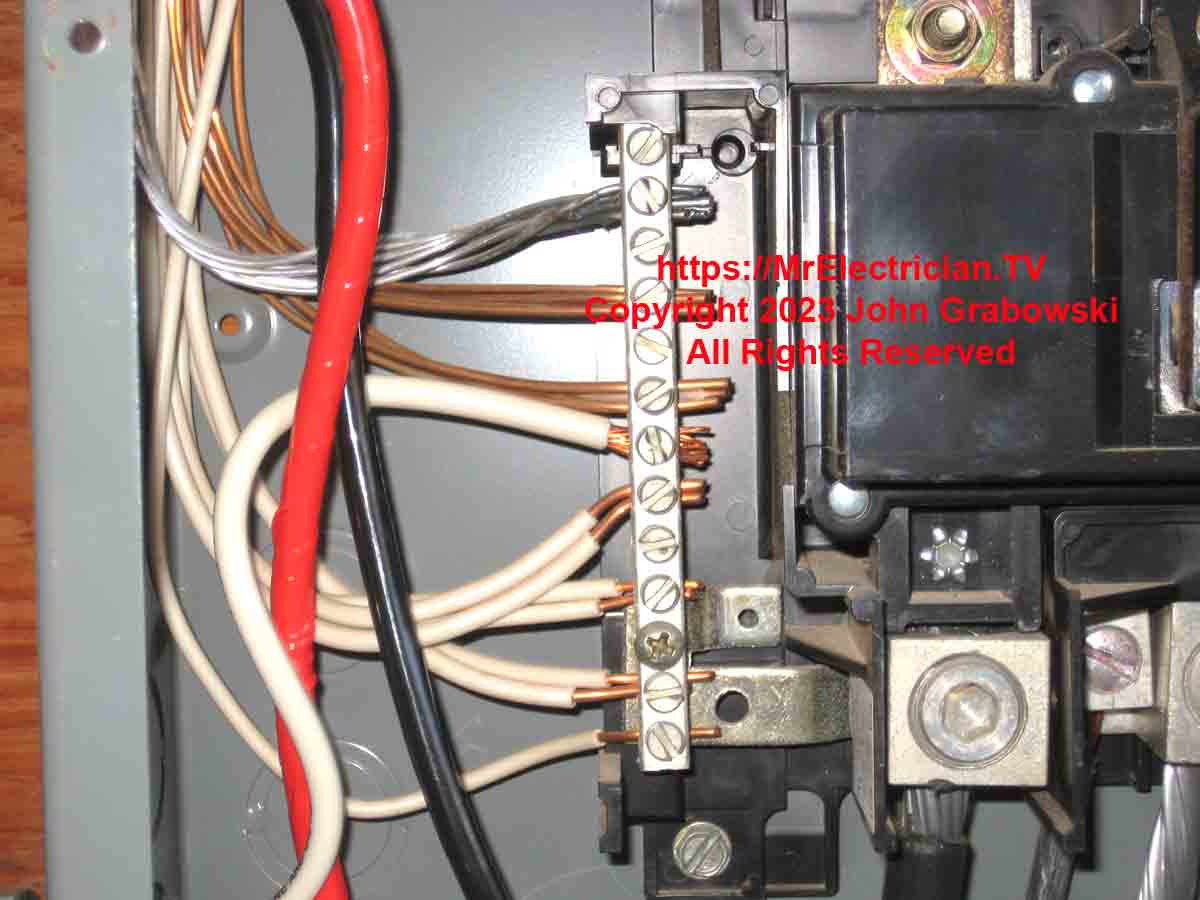
I informed the homeowner about the multiple white neutral wires under one screw. He said to leave it alone. The panel was approved for multiple white wires under a screw terminal at the time of the original installation in the early 1980s. However, the electrical code has changed, and now only one neutral wire is permitted under a screw.
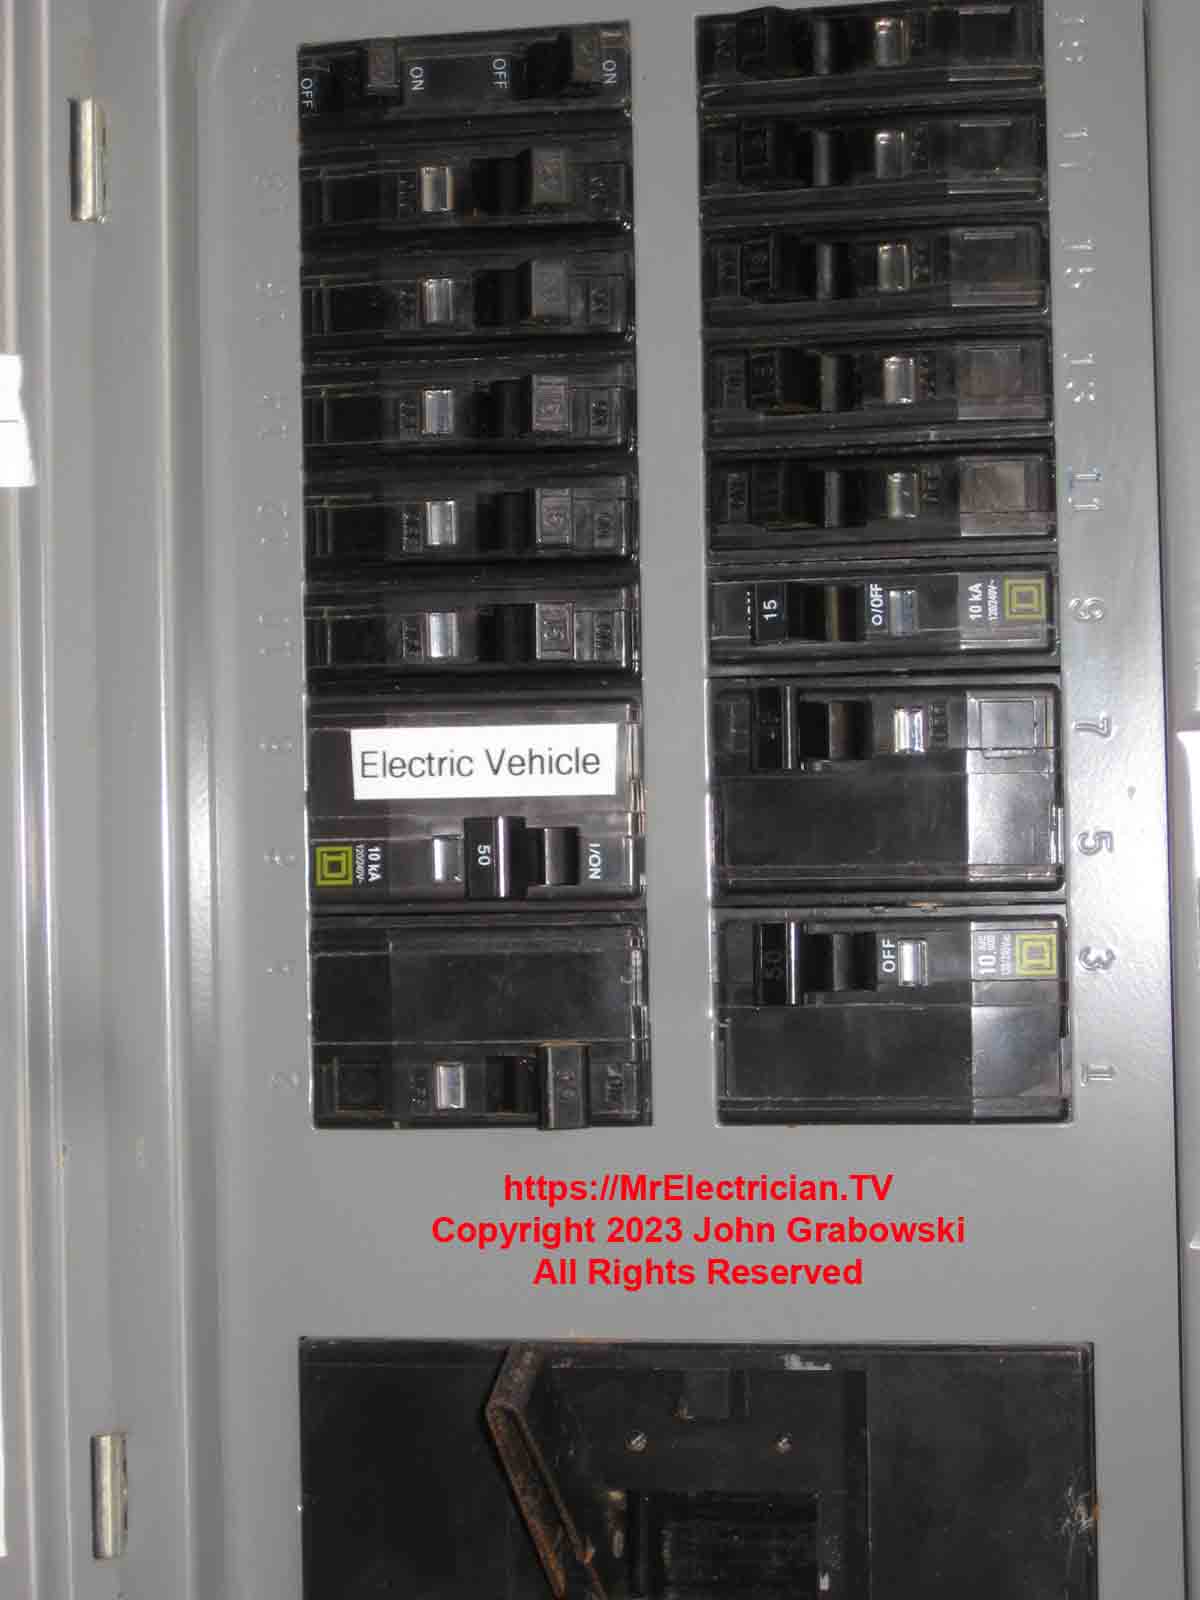
A two pole 50 amp circuit breaker was used with the #6 copper wire.
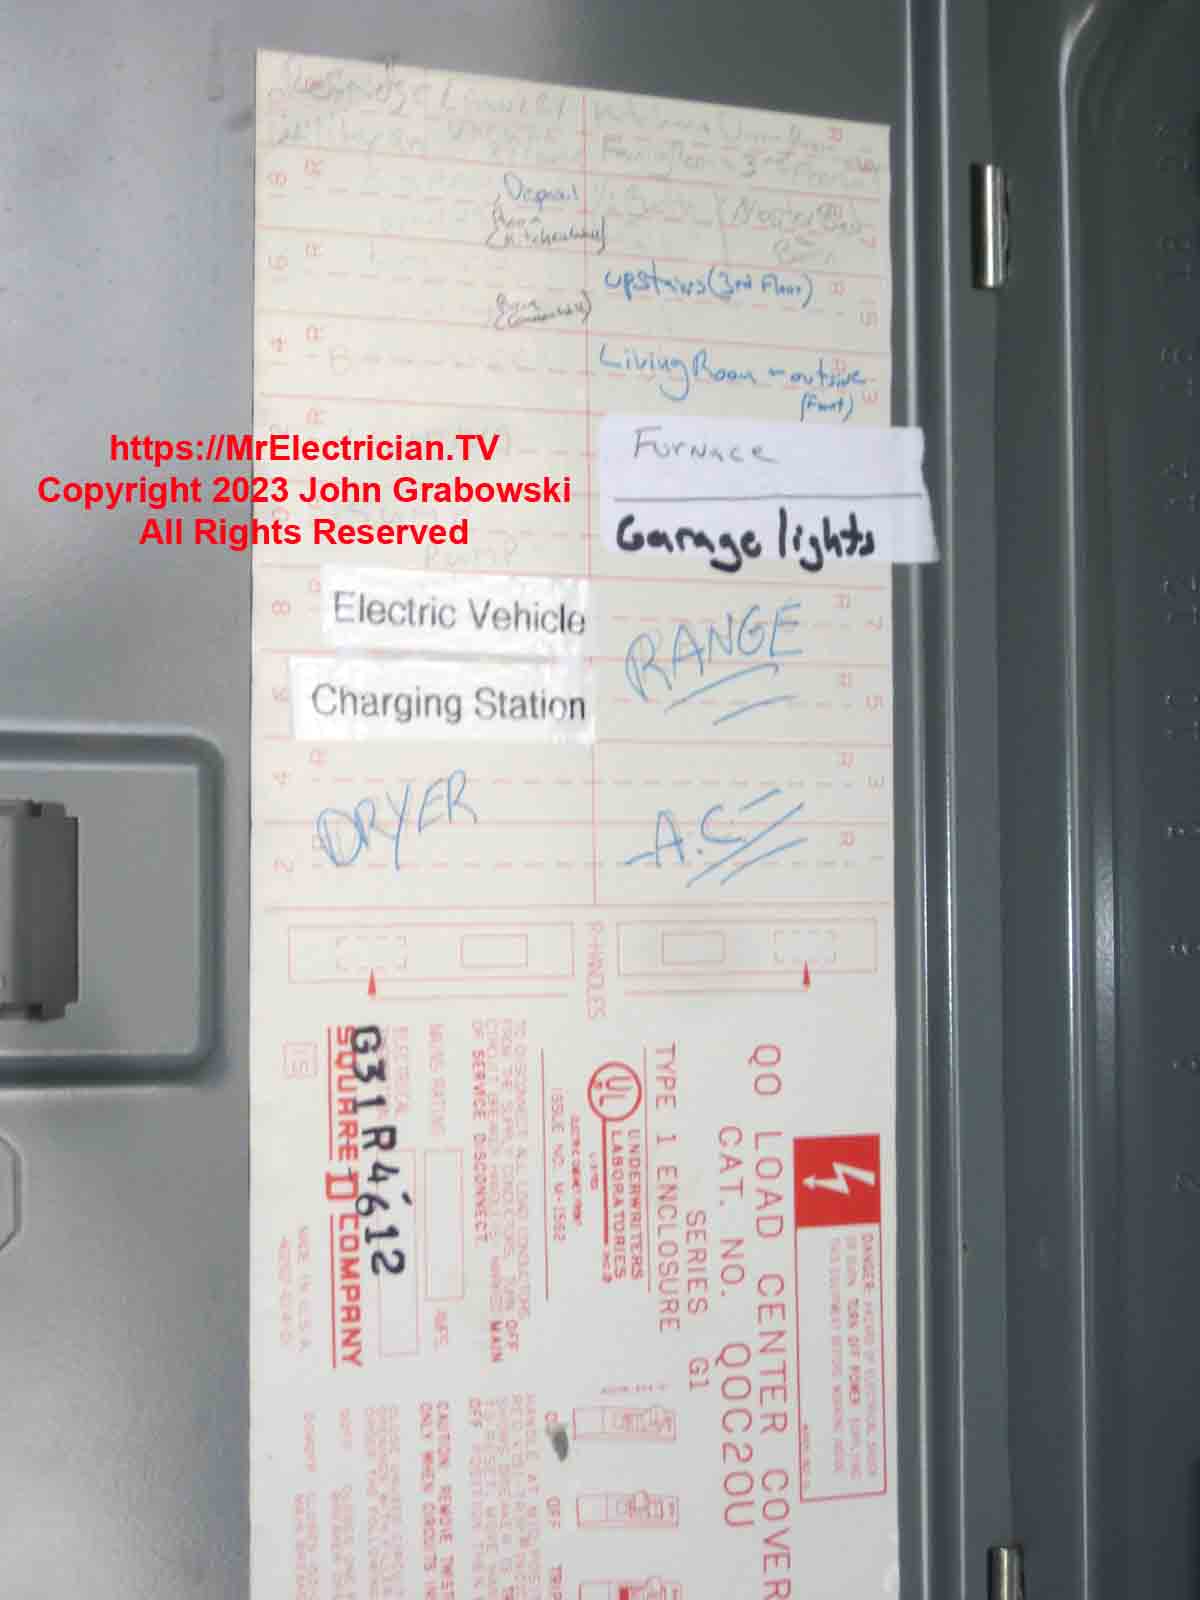
Labeling all electrical circuits in the main panel is a code requirement. I used my Brother P-Touch label maker to make the labels to install a Tesla wall charger.
A torque screwdriver is needed to torque the electrical connections inside the Tesla Wall Connector Charger to the correct specifications.
I think the screws that hold the front cover onto the base are Torx heads. Tesla furnishes a hex bit for these screws.
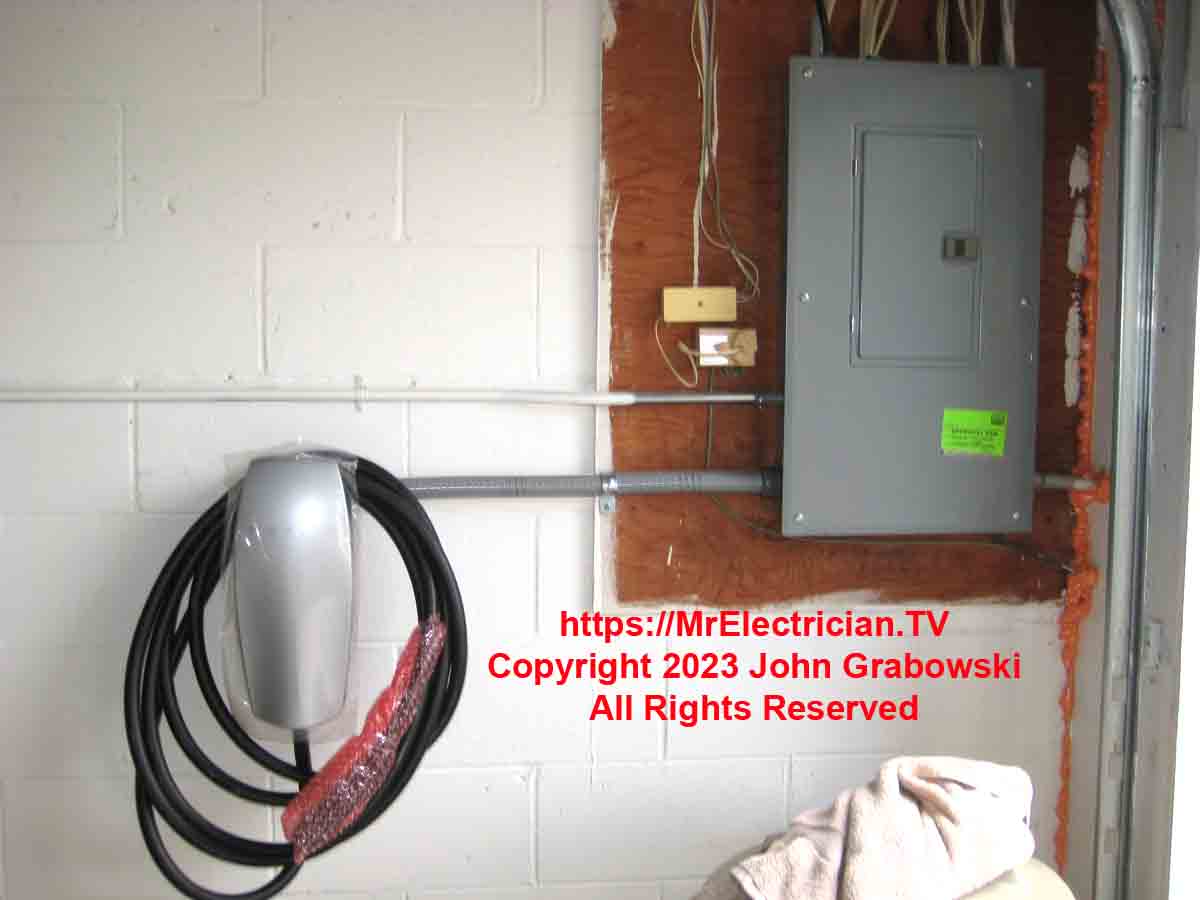

I added one conduit strap to hold the LFNC in place per Article 356.30 in the National Electrical Code.
The final part of how to install a Tesla wall charger is adjusting the amperage on the charger to the size of the electrical circuit feeding it. On the older chargers, I think there were DIP switches. The last Tesla charger I installed had a dial inside. All the information you need to know about this is in the Tesla Wall Connector installation instructions.
Here is a link to Tesla’s Wall Connector installation instructions.
CLICK HERE for a free link to the National Electrical Code online.
To see all of the categories of electrical topics discussed by Mr. Electrician, click here.
Click here for a FREE copy of my book “Almost Everything You Need To Know To Repair a Bathroom Exhaust Fan In Your Home.”
Visit my Link Tree for my social media connections.
To help keep this website free, please use this Amazon link for your purchases. As an Amazon Associate, I earn from qualifying purchases.
Get your required “Emergency Disconnect, Service Disconnect” labels and stickers to satisfy the 2023 National Electrical Code requirements in article 230.85(E)(1) and (2) by going to my Redbubble Shop here.
